Theme: Adobe Photoshop window elements. D evices working with the object. A group of drawing tools. Change the image background. The devices of the Painting the drawing white and black
Purpose: introduction to the interface of Adobe Photoshop.
Necessary tools and materials: PC, Adobe Photoshop.
Content and procedure of work
I. the repetition of the theoretical data;
II. The fulfillment of individual exercises and analysis of results;
III. Delivery of laboratory work.
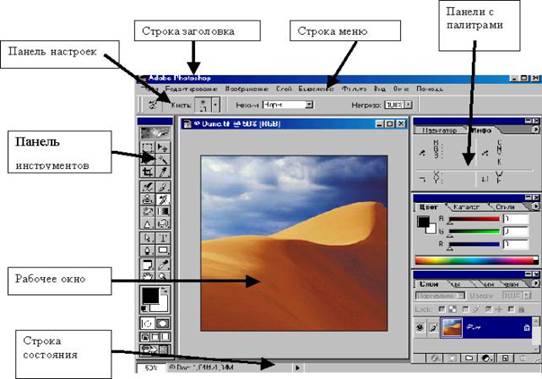
A window opens on the desktop that displays the images being processed. As a rule, there is a toolbar on the right. Panels with tool palettes are sprayed on the screen. Palettes allow you to select the editing mode of the tools. Each panel can have multiple palettes that you can move, move, and delete. At the top of the screen there is a number of menus, under which there is a mode change panel (settings panel). This panel allows you to select any of the different parameters of the selected tool. There is a status bar at the bottom of the screen. This line contains the name of the selected tool and the image parameters. There are 2 fields in the left corner of the status bar. 1. General Scale positions, that is, the size of the active page window is shown here. The information field indicates the amount of memory transferred to the video.
Figure 1. The program's interface is Adobe Photoshop
Tools panel.
The toolbar is the main tool for working with images. It consists of buttons corresponding to each instrument. Any tool can be activated with the mouse. You can then change the tool settings in the mode changes panel. If there is a small triangle at the bottom of the button, there are several types of this tool. To see its types, it is necessary to hold this button not to release a little. Then you will see a list of tools. The main tools are collected in group 4 of the sign.
1. The Tools used for extracting images:
* Selection of rectangular zones
* Selection of ellipse zones
* Cross path separation
* Selection of the vertical path
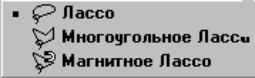
Move (move) – move a given fragment to another location. Lasso-allows you to surround the desired part with the mouse.
The types of lasso:
Polygon lasso tool-select a rectangular area. According to the magnetic lasso control, the division loop is automatically “attached”to the boundaries.
Magic wand (magic wand) – selects a zone of continuous pixels of the same color.
Move - allows you to move the selected zones.
2. Drawing tool:
pencil-pencil drawing
airbrush painting with a soft edge nozzles
brush (brush) - drawing with a brush of different shapes
eraser
stamp-copies part of the image to another. The Alt key allows you to select the desired location and copy the selected area with the mouse to another location.
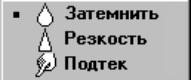
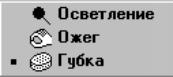
darken (darken) - blur picture
sharpness – increase the contrast bruise-drain color within the image (blurs)
lightening-reveal the color of the fragment
burn-make the fragment dark
sponge-reduced color saturation
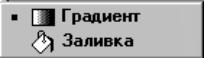
a gradient is the movement of the tool and the addition of colors to the selected area
fill-color continuous areas with the same colour.
3. Tools for creating new objects:
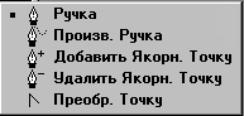
The handle is used to create and edit a curved contour. This button is used to alternate instructions in the following way:
1. General positions arbitrary grip-with this tool, you can draw moves and arbitrary (arbitrary) paths.
2. add anchor point (add anchor point)
- the path segment of this tool is preceded by a dot.
3. delete anchor point (delete anchor point) – deletes a point without breaking the contour when you click over the contour.
4. change point (convert point) - change point type. Move a point and change it from an angle to an arc.
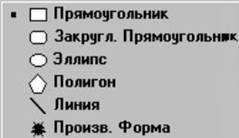
1. text-use this tool to enter text and format it.
2.
3. draw a rectangle-rectangle.
4. a rounded rectangle is a rounded rectangle.
5. draws an ellipse.
6. polygon-draw a polygon
7. ine-draws a line.
8. to draw the oblique form oblique shape.
9. eyedropper-click the eyedropper in a color in the video window, using that color as the image color.
4. Inspection and control tools:
· caption-used to move images displayed from the program window.
· zoom-work with the enlarged fragment.
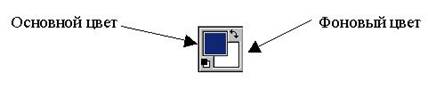
At the bottom of the toolbar there is a button to select the main and background color by clicking on the corresponding square.
2 сурет. Palettes.
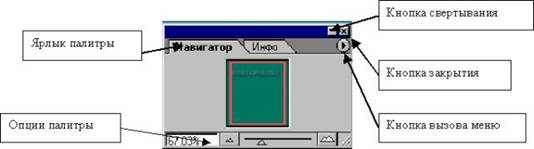
Palette is an auxiliary window in which the various operations on the video. Palettes are usually vertically arranged on 4 panels on the right edge. each panel has only one palette. The spine of the active palette is indicated by a light color. Like other Windows, panels can be placed elsewhere. If any panel is unclaimed, it can be closed or wrapped. When you click the arrow button, the command menu of the specified palette opens. You can use these commands to control the palette option. The first panel contains the Navigator and the info palette. They are designed to change the image size, and also stored information about the parameters of the selected instruments.
3 image.
On the second panel is a color directory palette and style. The first two are for selecting, creating, and editing colors, and the style palette is for text formatting. The following group includes the Layers, Channels, Paths, and Action History palettes. They provide work with layers and channels. It contains instructions about the last 20 operations performed, and allows you to write the name of multiple repetitive operations. You can stretch and shrink the selected area.
Corrective Foundation shade.
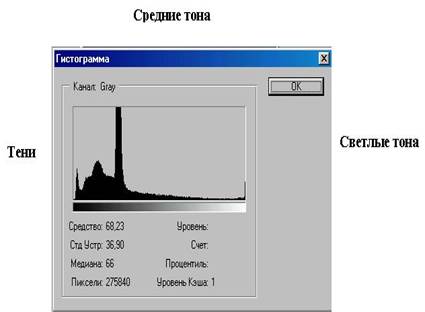
Means of tracking colors enable you to replace a poorly painted image in the open color. The hue of the video is characterized by the brightness of the pixel. They range from 0 to 255. The darkest shades correspond to 0, and the lightest shades-255. The pixel range of an image is called the hue range of the image. For each Photoshop image, you must run the image / histogram command.
On the horizontal axis is the value of light: from about to 255, and the vertical axis indicates the pixel size of each light level.
The shadow is the darkest part of the low-light image.
- light colors - the most open part of the image with high light. Between the shadow and the light shade is the middle shade.
Light value of different images:
* dark image histogram (most pixels have a low light value)
* open image histogram (most pixels have a high light value)
* matte image histogram (medium color)
The main task of color correction is to ensure the correct illumination of pixels in the image. Since the range of shades of the entered picture will be reduced with the help of the scanner,it is necessary to correct it.
Therefore, photos passed through the scanner are matte than the original. Photoshop runs the following command to correct the color. Image / settings. The command Brightness / worked in contrast causing the screen to 2 on the scale. Changing the brightness scale highlights the image as dark or dark. A controller is designed to change the accuracy of the image. The level command displays the histogram of the active image and the means to change the range of shades. Using the triangle in the lower right corner, you can change the dark or light color settings. This button is located under the histogram. To adjust, select the desired eyedropper and move the cursor to the appropriate area of the image. You can also run the Auto or Autolevel command. The Curves command opens a dialog box to correct the image to the screen.
Figure 5. Color balance correction.
An Image menu is available to change the position of the image. They consist of the following items:
* mode-allows you to adjust the mode of the edited image. If you set a different mode, the image results in a poor image state in this mode.
* settings - here you can change the color and color of the image. If you select, the action is performed only on the selected fragment.
A brief description of some of the Setup menu items:
* shades / saturation-the ability to mix colors.
* color balance-changes the composition of the primary colors.
* replace color-change any color in the picture.
D evices working with the object. A group of drawing tools.
· Purpose: to teach you how to work with drawing tools in Adobe Photoshop. Necessary tools and materials: PC, Adobe Photoshop. Content and order of work
· I. repetition of theoretical data;
· II. independent performance of exercises and analysis of results;
The first group of signs consists of an object and working devices. Area, with Lasso tools, you can select any area of the Video. Move (move) the device allows you to move and copy selected areas. Magic wand (amazing wand) device highlights the same colored areas. It is used for precise drawing of a complex clipping contour with a Lasso and an amazing wand.There are familiar Airbrush, Brush, Pencil, Eraser tools. Using the stamp tool, you can fix damaged image elements (old photos) by copying some part of the places where they were not destroyed. You can move the finger tool (finger) and the paint with a fresh application. The Blur/Sharpen tool, which can be selected alternatively, controls the color sharpness of individual parts. The Illuminator/dimmer/Bubka device is used to control the saturation and brightness of the local color.
Exercise 1. Working with a magnetic lasso tool.
1.Launch the Adobe Photoshop app.
2.Eagle.extract the PSD file from the archive and open Adobe Photoshop.
1.after increasing the image size by 200-300% percent, move the image using a hand tool.
2.use the magnetic lasso tool to select individual Golden Eagle wings and use the fill tool to paint the wings in different colors.
3. The appearance after coloring the drawing will look like this:
1. Exercise 2. Coloring a drawing using the amazing wand tool.
2.Launch the Adobe Photoshop app.
3.The pepper.extract the PSD file from the archive and open Adobe Photoshop.
1. Image size increases by 200-300% percent, hands move the image using the tool.
2. Amazing wand Fill, finish fruit with a tool use the tool to paint in different colors.
Exercise 3. Repair your drawing with the amazing wand tool.
1.Launch the Adobe Photoshop app.
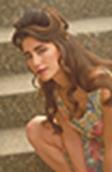
2.Atheletic.jpg and landscape.extract the jpg files from the archive and open Adobe Photoshop.
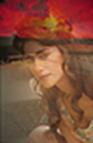
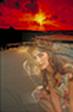
1. Atheletic.jpg revealing picture and amazing wand select the background around the girl using the tool. Note: you must select the Shift key and press the Shift key.
2. Now you need to select only the girl. To do this, select the Selection ► Invert the selection command or the key combination <Ctrl>+ < Shift>+<I>.
3. To save the selected object to the clipboard, click Edit > Copy (<Ctrl>+<C>). 4.landscape.go to the jpg file and paste the girl on this image page using the edit command ► Insert (<Ctrl>+<V>).
4. Moving place the girl in the right place with the tool. Save your work.
Change the image background. The devices of the group of gradients.
Necessary tools and materials: PC, Adobe Photoshop. Content and order of work I. repetition of theoretical data;
II. independent performance of exercises and analysis of results;
III. delivery of laboratory work.
1. The device is a Bucket. The gradient is in the same group as the instrument. Use this tool to fill a region with the primary color. (black and white shading is not applied to the photo). To configure the tool, you can open the properties panel by clicking 2 times on the device. Review the properties listed in the panel: - Layout in the fill zone smoothing and other image zone allows you to soften adjacent sides. - There are 2 options in the fill list: 1. Foreground-coloring the main color 2.When you select a template, a list opens that allows you to select options for the color template. You can prepare a sample of the filling yourself. This is called a decorative filler. The part of the image that should be obtained as a template is highlighted using the rectangular area tool.(The Pen parameter must be set to 0-K). After that, the edit menu opens and the sample command is executed. In the interview window, when entering the screen, enter the template name and click OK.
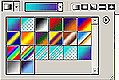
2. The devices of the group of gradients. To create a gradient, that is, to fill a zone with one color in another. In this device, you can click 2 times and open the properties panel. Indeed, this tool consists of several tools. Their buttons are located in the properties panel:
- Linear gradient
- Radial gradient
- Angular gradient
- The reflected gradient
- Diamond-shaped gradient
To use the gradient it is necessary to allocate the appropriate area. Answers: Kulik Maria Viktorovna if the FA has not yet been amortized, then you need to make a sale at the residual value to an individual. After clicking on the gradient device, a line goes through the mouse to the selected area. The line length can be either shorter or longer in relation to the selected area. Creating gradient fills. In Adobe Photoshop, there is a gradient editor that allows you to save gradients created in Adobe Photoshop and then use them. To display the editor window, click on the gradient tool, and then click on the gradient model in the Properties panel. The gradient editor allows you to define the original and last colors of a new gradient, and change the color of a pre-created gradient. The main feature of this editor is that it allows you to build mutual transitions between complex gradients –three or more colors.
Exercise 1. Replacing the image background.
1.Launch the Adobe Photoshop app.
2.Men.jpg and landscape.extract the jpg files from the archive and open Adobe Photoshop.
3.Men.► Auto level adjustments (<Ctrl>+ < Shift>+ < L>).
1. Amazing wand select the background of the image using the tool.
2. now run the following command: Select ► Modify ► Expand. In the window that appears, enter a value of 2 pixels.
3. Now go to the file with the image of the mountain picture, run the Select all command (<Ctrl>+<A>) and copy it to the clipboard.
4. Men Again.go to the jpg image and perform Editing ► Paste to the command (<Ctrl>+ < Shift>+ < V>).
5. merge layers by command: Layer ►Выполнить сведение.
Exercise 2. Using a gradient fill to a drawing.
1.Launch the Adobe Photoshop app.
2.Men.extract the jpg file from the archive and open the Adobe Photoshop file.
1.Men.► Auto level adjustments (<Ctrl>+ < Shift>+ < L>).
Amazing wand select the background of the image using the tool.
1. no selection, Gradient select a tool.
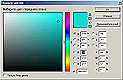
2. Foreground and background colors use the tool to select a background color.
foreground:for background:
Color collector teresas
R:
14
R:
94
G:
218
G:
43
B:
211
B:
162
3.
4.
5.
7. Select the gradient type on the gradient toolbar. Foreground to Background (from the foreground color to the background).
The toolbar Gradient
· 5. Choose different types of gradient (Linear, Radial, Angular, Reflected, Diamond-Shaped).
Painting the drawing white and black
Exercise 1. The coloring of the picture black & white. (1st method)
1.Launch the Adobe Photoshop app.
2.fruits.extract the tif file from the archive and open Adobe Photoshop.
1. 1. use the following command to create a new layer: ► New Layer... (<Ctrl>+ < Shift>+ < N>) 2.Set the blending mode from the layers palette.
Brush set the tool parameter as follows:
6. Foreground and background colors select the desired color and color the image. 2.merge layers using the command: Layer ► perform a merge.
Exercise 2. The coloring of the picture black & white. (2nd method)
1.Launch the Adobe Photoshop app.
2.girl.extract the jpg file from the archive and open the Adobe Photoshop file.
2. Create a new layer on the layer where the image is located. ► New Layer... (<Ctrl>+ < Shift>+ < N>) 2.Set The color from the mix list to set the layer palette (Layers).
3. Brush set the tool parameter as follows:
4. Foreground and background colors of the required color
6. select and colorize the image.
7. merge layers using the command: Layer ► perform a merge.
Laboratory work 4-6
Changing the color image to black and white. S-type for Web pages button Assembly. Quick mask mode. A method for combining two images. W orking with text. Working of t ext effects
Goal: to master the method of drawing images in Adobe Photoshop. Necessary tools and materials: PC, Adobe Photoshop. Content and order of work
Launch the Adobe Photoshop app.
dessert.extract the tif file from the archive and open Adobe Photoshop.
1. 1.Image ► Mode ► run the Black and white command to change the image to black and black.
2. 2.Set The color from the mix list to set the layer palette (Layers).
3. Brush set the tool parameter as follows:
4. Foreground and background colors select the desired color and color the image.
5.
5.merge layers using the command: Layer ► perform a merge.
Purpose: to study the method of image processing in Adobe Photoshop. Necessary tools and materials: PC, Adobe Photoshop. Content and order of work
I. repetition of theoretical data;
II. independent performance of exercises and analysis of results;
III. delivery of laboratory work.
1.Launch the Adobe Photoshop app.
2.oldfoto.extract the tif file from the archive and open Adobe Photoshop.
1. Image ► Mode ► run the Black and white command to change the image to black and black.
2. Brush and a copy Stamp use the tools to repair the image.
3. Image ► Adjustments ► run the Brightness/Contrast command and change the image color if necessary.
Exercise 1.
1. File ► create a new image by running the New command (<Ctrl>+<N>). Set the parameter as follows:
Width:
500 pixels
window name
Height:
45 pixels
Permission:
72 pixels / inches'
Mode:
RGB color
Content (background):
white
1. new page instruction
2. new page Ellipse use the tool to set a circular shape in the upper-left corner of the drawing.
2. Press and hold the <Shift> key and rotate the circular shape into a rectangle.
3. Casting use the tool to color the selected area blue.
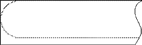
4. Pen use the device to set points, such as the image below.
Now the Conversion points remove the tool and stretch the points horizontally.
3. Load path as selection select the area indicated by the tool (located in the Path palette). Now go to the layers palette, select the layer where the image is displayed, and click Delete.
4. Delete the path formed from the Path palette.
Rectangle use the tool to delete an unnecessary area.
6. Layer ► layer effect ► use the bump commands to render the image as follows:
·
Exercise 1. Merge two images. (Method 1).
1.Launch the Adobe Photoshop app.
2.beach.TIF and factory.Open the TIF files from the archive and open Adobe Photoshop. The dimensions of the two images must be the same.
1. beach.To stretch the TIF image, press the <Q> key to switch to quick mask mode. 2. Replace the front surface and background with white and black.
2. Gradient use the device to draw a hyphen from top to bottom.
3. 3.after it is in quick mask mode, the white color looks transparent and the black color looks red
5. 4.Press the <Q> button to switch to normal mode.
6. 5.after completing the above steps, half of the drawing differs in invisible pixels.
4. now draw the second picture. Select all or use the <Ctrl>+<A> command to select the entire picture.
5. Editing the selected image ► copy the selected image to the clipboard using the Copy command (<Ctrl>+<C>).
6 Go back to the first picture and edit ► Paste In or (<Ctrl>+ < Shift>+<V>).
7. merge layers using the command: Layer ► perform a merge.
Exercise 2. 2nd method of combining two drawings.
1.Launch the Adobe Photoshop app.
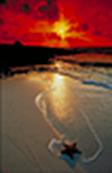
2.portrait.TIF and sea.Open the TIF files from the archive and open Adobe Photoshop. The dimensions of the two images must be the same.
1. draw a file with the image of a girl.
1. select the girl using the magnetic Lasso tool.
2. Selection ► run the Blend command and modify the image (for example, 60).
3. copy the selected image to the clipboard Editing ► Copy (<Ctrl>+<C>).
4. go to the second photo and Edit it with Insert (<Ctrl>+<V>).
5. 1.Reduce the layer that shows the girl's photo.
6. merge layers using the command: Layer ► perform a merge.
W orking with text
Exercise 1. To write fire. The 1st method.
1. Launch the Adobe Photoshop app.
2. Create a new picture using the New command (<Ctrl>+ < N>) file►. Set the following parameters:
Width: 10 cm
Height: 7 cm
Working of t ext effects
Goal: to learn how to write text in different styles of Adobe Photoshop.
Necessary tools and materials: PC, Adobe Photoshop.
Content and order of work
I. repetition of theoretical data;
II. independent performance of exercises and analysis of results;
III. delivery of laboratory work.
Exercise 1. Creating a blood drop text.
1.Launch the Adobe Photoshop app.
2. Create a new picture using the New command (<Ctrl>+ < N>) file►. Set the following parameters:
Width: 15cm
Height: 7 cm
Resolution: 72 pixels / inch
Mode: RGB color
Content (background): Black
3. Тext record the label blood using the tool:
Font type: Time Ne
Roman
Font Type: Bold Italic
Size: 150 PCs
Color: B
4. Use the move device to drag the record up.
5. Connect the layers: ► layer to the bottom One (<Ctrl>+<E>).
5. Image ► Rotate Canvas ► 90° counterclockwise
5. 5.Wind: Filter ► Stylize ► Wind... run the command 5 times.
Direction (direction): From the Right (Right)
6. Image ► Rotate Canvas ► 90o clockwise
7. ► Sketch ► Stamp Filter
Light/Dark Balance:
5-6
Smoothness:
8. Image ► Adjustments ► Invert (<Ctrl>+<I>).
9. Selection ► All (<Ctrl>+<A>) select the image and copy it to the clipboard.
10. Editing ► Copy (<Ctrl>+<C>).
11. press the < Delete> key from the keyboard.
12. go to the channel palette and create a new channel.
13. switching to a new channel set the text in the buffer.
14. Editing ► Paste (<Ctrl>+<V>).
15. go to the RGB channel and return to the floors (<Ctrl>+<V>).
16. press the key combination <Ctrl>+<Alt>+<4>.
17. apply the selected area in red.
4. Фильтр ► Sketch ► Bas Relief
Exercise 2. To write the text, "Marsh inscription."
Laboratory work № 7-9
I mage simulation. C reating a multi-layer view. Working with layers. T he possibility of creating complex images. C reating a collage for an image. Creating edges of different types for a drawing.
Goal: learn how to work with filters in Adobe Photoshop.
Necessary tools and materials: PC, Adobe Photoshop.
Content and order of work
I. repetition of theoretical data;
II. independent performance of exercises and analysis of results;
III. delivery of laboratory work.
Laboratory work № 10-12
Content and order of work
I. repetition of theoretical data;
II. independent performance of exercises and analysis of results;
III. delivery of laboratory work.
Exercise 1.
1. Adobe Photoshop run the program.
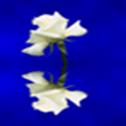
2. flower from the package of my documents.open the tif image.
1. select a flower using any method.
2. copy the color to the clipboard.
3. Create a new image:
Length:
300 pixels
Height:
200 pixels
Permission:
72 pixels/ inches'
Mode:
RGB color
Content (background):
white
4. put a flower from the clipboard.
5. align the bottom surface of the drawing.
6. front surface color light blue __ color, and the background color is dark blue __ to set the color.
7. go to the background surface. Use the following filter on the background: ► Render ► Clouds Filter.
1. copy each other's pages.
2. set the image size as follows:
Image ► canvas Size.
3. select the lower part of the image using the amazing wand (sensitivity = 0).
4. similar to the gradient type below selected color.
5. Now use the gradient.
6.The allocation ► run the command to Invert the selection.
Copy the specified part.
8. Set the image vertically: image ► Rotate the canvas ► Flip vertically.
9. put a picture.
10. set the image up.
11. set the image vertically: image ► Rotate the canvas ► Flip vertically. Set the copied page down.
12. set the brightness of this page to 50%.
13. select the lower part of the image.
14. set the following filter ► Distort ► Ocean Ripple.
Ripple size: 9
9
Ripple Magnitude: 6
6
15. delete the selection.
16. merge pages.
Exercise 2. Wrapped corner
Train.open the tif file.
4. Path policysend Pen don't Add a point use the tools to create a contour with a spray angle.
5. create a new layer.
6. click the dotted circle located in the Path palette and move the selected path.
7. select the gradient colors as shown below.
8. gradient the selected area.
9. remove the way.
10. select the corner layer and color it in any color.
11. connect the layers.
Content and order of work
I. repetition of theoretical data;
II. independent performance of exercises and analysis of results;
III. delivery of laboratory work.
Exercise 1. To create the texture "wood".
Distribution: Uniform
Monochrome:
6. Filter ► Blurring ► performing the motion blurring method and using the image filter.
Distortion:
0°
Distance:
300 pixel
7. Filters ► Other ► Offset... execute the method.
7. Select all or run < Ctrl>+<A> and copy the image to the clipboard <Ctrl>+<C>.
8. create a new file with this parameter and paste the image in the clipboard <Ctrl>+ < V>.
9. ► Rotate the Canvas ► 90° clockwise run the command and flip the image.
10. 10.paste the copied image again <Ctrl>+<V>.
11. Click on the new layer in the layers palette
12. The mixing settings window appears.
The blend mode of:
Fill in the translucency:
70%
13. connect the layers.
14. with an amazing wand with black, white, gray color. __, white green __ paint with colors.
Content and order of work
I. repetition of theoretical data;
II. independent performance of exercises and analysis of results;
III. delivery of laboratory work.
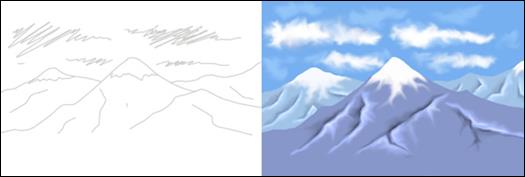
Drawing with tools
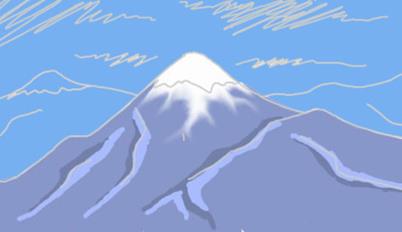
In this lesson, you will learn how to draw and color drawings using Adobe Photoshop. For example, a mountain drawing.
1. Create a new document with a white background size of 600*400px.
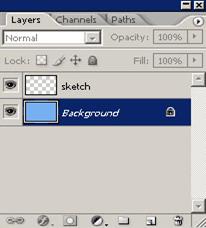
Create a new layer and call it "sketch". This is what we need to draw the outline of the drawing. Brush take the tool, 3 pixels and light gray color.
2. Draw a General sketch of the drawing. 3. " select the "background" layer using the fill tool and set the background to a light blue color. 4. Again, we create a third new layer, which we call "mountain". We put the layer under the "sketchquot" layer.
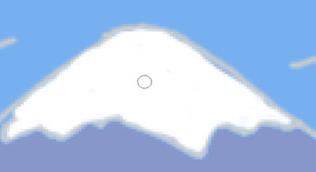
Magnetic lasso we can use it to highlight the flag as shown in the image. 5. Edit-fill with the highlight color with the same color command. 6. Use the Kits tool to paint the Jungar part of the mountain white. 7. In order to draw the drawing in a way that corresponds to reality, you need to apply the tool (9 px) down the white iced part of the mountain on your finger. Below
look at the picture. 8. Now you need to draw other parts of the mountains. Here we choose a gray ink surface that looks like a shadow through the Brush to the sides of the mountain, and light colors. Look at the picture.
9. Again, take the Finger tool and mix the same way as in the picture shown in these two colors. 10. The first mountain was ready, now we repeat these operations for the other two mountains. Then you should have a similar picture. To do this, we start creating a new layer with a slope, the name of which we call "Mountain_2". Place it under the first layer of the mountain.
11. The last element that adds to our drawing is the cloud. Create a new layer and call it "clouds". With a brush, we can draw a cloud. Then use the Finger tool to transform the image of the cloud.
As a result, we will have this picture.:
Laboratory work № 13-15
G etting to know the Corel Draw editor. User interface. S implest approaches to objects. Working with text. Formatting plain text. W orking with multiple objects. C reating a layout. Working with layers.
Goal: getting to know the interface of the Corel Draw program.
Necessary tools and materials: PC, Corel Draw program.
Content and order of work
I. repetition of theoretical data;
II. independent performance of exercises and analysis of results;
III. delivery of laboratory work.
The Corel Draw working window is not very different from other image editors. Launch the Corel Draw app. Vector graphics are familiar with the main elements of the working window of the Corel Draw editor.
In accordance with the Windows standard, a menu bar is placed under the title bar. Below it is the standard toolbar, followed by the property bar. To the left of the window is the toolbar (tollbox), to the right-the color palette (Color palette), at the bottom-the status bar (can be located up).
Rulers
Work
zone
Menu Path
The color palette
Standard toolbar
Toolbar
Subject line
Status bar
Figure 1. CorelDraw working window
It remains a good mood and adjustment of the way
You can configure the status bar on the screen in one of the following ways:
1. with the mouse;
2. Click with the right mouse button on the status bar.
Using the user command > Status Bar > Position > Top (Bottom).
To change the width of the status bar, run the appropriate command Customize > Status Bar > Size > One line (Two lines). One line is one road wide, and two lines wide.
3.in the Options dialog box, on the Workspase > custom settings > Command Bar page, in the Status Bar Property Settings group, select the desired type.
To delete the status bar, do one of the following (to display the status bar):
1.setting or removing the flag next to the Status Bar track in the work area context menu.
2.in the Options dialog box, remove the corresponding flag on the Workspase > custom settings > Command Bars page.
To display/delete status bar items, select the Status Bar from the list at the top of the Workspase > custom settings > Commands page. To add a new field to the status bar, we will delete it from the interview window to the status bar. Field from the status bar
Information specified in the status bar:
1. Mouse Position the current mouse coordinates.
2. Info line-a comment about transformations that can be performed by the User in accordance with the actions performed by the user.
3. Object Detales – full information about the selected object.
4. Object Information – General information about the selected object.
5. Time – current time.
6. Date – current date and date of the week.
7. Outline – the type, color, and thickness of the object's outline.
8. Fill – type of filling.
9. disabling or enabling the CAPS, NUM, and SCROOL indicators.
10. Memory Allocated – the amount of additional memory used.
11. Swap Remaining - CorelDraw – the amount of memory that remains necessary.
Docker Windows.
Docker Windows are designed to dynamically change object parameters when working. Unlike dialog boxes, Docker Windows are not modeled, i.e. they allow the user to perform any actions while in the open position. To display the Docker window on the screen, you must do one of the following:.
1. Window > Docker;
2. using the assigned corresponding key;a frequently used Docker window is released with a menu command. Docker Windows are located in the last place on the screen.
CorelDraw window.
3. configuring the CorelDraw menu.
Task:
1. draw shapes in the drawing.
2. Change the internal color and contour thickness of each shape, color.
3. Өзіңіздің папкаңызда “фигуры” деп сақтаңыз.
Very complex drawings in CORELDRAW are formed from a few simple objects. Therefore, in order to edit the image in the future, you need to create various vector objects.
Draw a simple shape
Simple geometric objects created in CORELDRAW include rectangular and elliptical lines, polygonal and spiral lines, and straight and curved lines. Some complex objects consist of many simple objects. Therefore, you need to be able to build it. Let's start drawing your experience with a rectangle. From the Toolbox toolbar (Graphics) located on the left side of the program window Select the "Rectangle Tool". In this case, the button type changes and switches to the specified position, which means that you are in the rectangle construction mode. As long as you select a different tool, it will be in the same position as the button. Place the mouse pointer anywhere in the work area. This switches the arrow to the cross type. Click the left mouse button and drag it without releasing it. A rectangle will appear on the screen, and its size changes with the mouse movement. After getting the desired size, click the mouse button and you will see an image of a right triangle on the screen. (3.1.-figure).
Next to the built object, we see black rectangles and the x sign in the center, and contour rectangles on the vertices. All these are management elements designed for editing an object. We discuss their application in the following sections. This is how the ellipse is constructed.
Task:
1.1. from the Toolbox toolbar (Graphics) «Select the Ellipse Tool and insert the ellipse.
1.2. press and hold the Ctrl key, select the rectangle and ellipse command, and insert the square and circle.
1.3. draw a rectangle associated with the center point. To do this, drag the mouse pointer to the center of the object under construction. Press the Shift button and insert the rectangle without releasing it. Make sure that the center of the object matches the original position of the pointer.
1.4. This is how you can draw all simple shapes using the Ctrl and Shift keys.
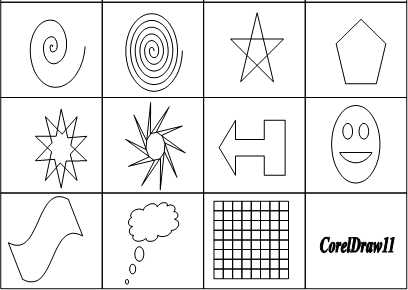
Draw polygons
To draw polygons with different numbers of walls, follow these steps:
1.select the polygon Tool. Pointer near besbris
crestco will be there.
2.Select the starting point and drag it to the right and down. The number of polygon walls according to the agreed number is 5. there is a similarity in the construction of ellipses and polygons. You can also draw a polygon from a corner or center (press and hold the Shift key). If you hold CTRL during construction, the correct polygon will be placed. The Pentagon that we will build is surrounded by a manipulator, like any object, and there are 10 nodes in each of the corners at once and in the center of each of the walls. The vertex of a Pentagon (vertex) (like any polygon with odd numeral walls) goes up when it is placed from top to bottom.
3.you can change the number of polygon walls. The corresponding input line in the properties panel is marked with an asterisk. The number of walls of a polygon
The number of walls of a polygon
The number of walls can vary from 3 to 500. This feature can be transfer at an agreed consent for all new facilities, as well as other properties of the polygon.
A polygon can be convex (the outer corners are convex) (each of the corners is less than 180) or a star. The length of star-shaped polygons (beams) is not passed to the properties panel. It can only be changed in interactive mode. Click on any of the nodes and send it to the center or center depending on the required number of stars. If you rotate a polygon node, it turns into a complex shape whose eyes intersect repeatedly. For example, insert a 12-wall polygon, drag a node on its wall inside the object, about a third of the way to the center, and then drag this node along the circle. When the node rotates, it changes the appearance of the star, and its rays form colorful joints.
Using the polygon Tool, you can draw not only a star-shaped polygon, but also the star itself. Its rays are connected between segments that pass through the inner zone of the object. Select a five-pointed star, then click on the star button (a small blue star is built in it).The object turned into an icon. Now note that the button contains a polygon. The rebellion dates back to the original restoration of the figure.
Note: if the radiation of a star is greater than seven, you can change the length of the star by using the slider in the properties panel (a triangle is built next to it). The more right the slider is, the sharper the star's rays will be.
Task:
1. from the Toolbox panel (Graphics) select the tool and insert the polygon.In the properties panel, select the number of polygon ceilings. Try putting on the first 5, and then on 11.
2. put two of the Pentagon. To do this, move the mouse below the starting point, and then up. Compare the shapes from the five superimposed corners. Conclude.
3. If you press the Delete key, the last built shape will be deleted.
4. from the properties panel Press the Star key. Note the change to the previously constructed object.
5. draw a polygon with the ceiling number equal to 11. Press the Star key in the properties panel and change the field value to 4 using the slider, as shown in figure. 3.2..
сырғытпа
6. Press and hold the Ctrl key. Put the polygon in the above way and release the Ctrl key. As a result, every fifth ceiling is connected to each other, eleven correct corners are laid at a high angle. Set the value 2 in the field using the slider. The star changes its type. Now the connection is not from four, but from two ceilings.
infopedia.su Все материалы представленные на сайте исключительно с целью ознакомления читателями и не преследуют коммерческих целей или нарушение авторских прав. Обратная связь - 3.135.201.209 (0.384 с.)


 Select the "Rectangle Tool". In this case, the button type changes and switches to the specified position, which means that you are in the rectangle construction mode. As long as you select a different tool, it will be in the same position as the button. Place the mouse pointer anywhere in the work area. This switches the arrow to the cross type. Click the left mouse button and drag it without releasing it. A rectangle will appear on the screen, and its size changes with the mouse movement. After getting the desired size, click the mouse button and you will see an image of a right triangle on the screen. (3.1.-figure).
 Next to the built object, we see black rectangles and the x sign in the center, and contour rectangles on the vertices. All these are management elements designed for editing an object. We discuss their application in the following sections. This is how the ellipse is constructed.
Task:
1.1. from the Toolbox toolbar (Graphics)
Next to the built object, we see black rectangles and the x sign in the center, and contour rectangles on the vertices. All these are management elements designed for editing an object. We discuss their application in the following sections. This is how the ellipse is constructed.
Task:
1.1. from the Toolbox toolbar (Graphics)  «Select the Ellipse Tool and insert the ellipse.
1.2. press and hold the Ctrl key, select the rectangle and ellipse command, and insert the square and circle.
1.3. draw a rectangle associated with the center point. To do this, drag the mouse pointer to the center of the object under construction. Press the Shift button and insert the rectangle without releasing it. Make sure that the center of the object matches the original position of the pointer.
1.4. This is how you can draw all simple shapes using the Ctrl and Shift keys.
Draw polygons
To draw polygons with different numbers of walls, follow these steps:
1.select the polygon Tool. Pointer near besbris
crestco will be there.
2.Select the starting point and drag it to the right and down. The number of polygon walls according to the agreed number is 5. there is a similarity in the construction of ellipses and polygons. You can also draw a polygon from a corner or center (press and hold the Shift key). If you hold CTRL during construction, the correct polygon will be placed. The Pentagon that we will build is surrounded by a manipulator, like any object, and there are 10 nodes in each of the corners at once and in the center of each of the walls. The vertex of a Pentagon (vertex) (like any polygon with odd numeral walls) goes up when it is placed from top to bottom.
3.you can change the number of polygon walls. The corresponding input line in the properties panel is marked with an asterisk. The number of walls of a polygon
The number of walls of a polygon
The number of walls can vary from 3 to 500. This feature can be transfer at an agreed consent for all new facilities, as well as other properties of the polygon.
A polygon can be convex (the outer corners are convex) (each of the corners is less than 180) or a star. The length of star-shaped polygons (beams) is not passed to the properties panel. It can only be changed in interactive mode. Click on any of the nodes and send it to the center or center depending on the required number of stars. If you rotate a polygon node, it turns into a complex shape whose eyes intersect repeatedly. For example, insert a 12-wall polygon, drag a node on its wall inside the object, about a third of the way to the center, and then drag this node along the circle. When the node rotates, it changes the appearance of the star, and its rays form colorful joints.
Using the polygon Tool, you can draw not only a star-shaped polygon, but also the star itself. Its rays are connected between segments that pass through the inner zone of the object. Select a five-pointed star, then click on the star button (a small blue star is built in it).The object turned into an icon. Now note that the button contains a polygon. The rebellion dates back to the original restoration of the figure.
Note: if the radiation of a star is greater than seven, you can change the length of the star by using the slider in the properties panel (a triangle is built next to it). The more right the slider is, the sharper the star's rays will be.
Task:
1. from the Toolbox panel (Graphics)
«Select the Ellipse Tool and insert the ellipse.
1.2. press and hold the Ctrl key, select the rectangle and ellipse command, and insert the square and circle.
1.3. draw a rectangle associated with the center point. To do this, drag the mouse pointer to the center of the object under construction. Press the Shift button and insert the rectangle without releasing it. Make sure that the center of the object matches the original position of the pointer.
1.4. This is how you can draw all simple shapes using the Ctrl and Shift keys.
Draw polygons
To draw polygons with different numbers of walls, follow these steps:
1.select the polygon Tool. Pointer near besbris
crestco will be there.
2.Select the starting point and drag it to the right and down. The number of polygon walls according to the agreed number is 5. there is a similarity in the construction of ellipses and polygons. You can also draw a polygon from a corner or center (press and hold the Shift key). If you hold CTRL during construction, the correct polygon will be placed. The Pentagon that we will build is surrounded by a manipulator, like any object, and there are 10 nodes in each of the corners at once and in the center of each of the walls. The vertex of a Pentagon (vertex) (like any polygon with odd numeral walls) goes up when it is placed from top to bottom.
3.you can change the number of polygon walls. The corresponding input line in the properties panel is marked with an asterisk. The number of walls of a polygon
The number of walls of a polygon
The number of walls can vary from 3 to 500. This feature can be transfer at an agreed consent for all new facilities, as well as other properties of the polygon.
A polygon can be convex (the outer corners are convex) (each of the corners is less than 180) or a star. The length of star-shaped polygons (beams) is not passed to the properties panel. It can only be changed in interactive mode. Click on any of the nodes and send it to the center or center depending on the required number of stars. If you rotate a polygon node, it turns into a complex shape whose eyes intersect repeatedly. For example, insert a 12-wall polygon, drag a node on its wall inside the object, about a third of the way to the center, and then drag this node along the circle. When the node rotates, it changes the appearance of the star, and its rays form colorful joints.
Using the polygon Tool, you can draw not only a star-shaped polygon, but also the star itself. Its rays are connected between segments that pass through the inner zone of the object. Select a five-pointed star, then click on the star button (a small blue star is built in it).The object turned into an icon. Now note that the button contains a polygon. The rebellion dates back to the original restoration of the figure.
Note: if the radiation of a star is greater than seven, you can change the length of the star by using the slider in the properties panel (a triangle is built next to it). The more right the slider is, the sharper the star's rays will be.
Task:
1. from the Toolbox panel (Graphics)  select the tool and insert the polygon.In the properties panel, select the number of polygon ceilings. Try putting on the first 5, and then on 11.
2. put two of the Pentagon. To do this, move the mouse below the starting point, and then up. Compare the shapes from the five superimposed corners. Conclude.
3. If you press the Delete key, the last built shape will be deleted.
4. from the properties panel
select the tool and insert the polygon.In the properties panel, select the number of polygon ceilings. Try putting on the first 5, and then on 11.
2. put two of the Pentagon. To do this, move the mouse below the starting point, and then up. Compare the shapes from the five superimposed corners. Conclude.
3. If you press the Delete key, the last built shape will be deleted.
4. from the properties panel  Press the Star key. Note the change to the previously constructed object.
5. draw a polygon with the ceiling number equal to 11. Press the Star key in the properties panel and change the field value to 4 using the slider, as shown in figure. 3.2..
Press the Star key. Note the change to the previously constructed object.
5. draw a polygon with the ceiling number equal to 11. Press the Star key in the properties panel and change the field value to 4 using the slider, as shown in figure. 3.2..

 Tools panel.
The toolbar is the main tool for working with images. It consists of buttons corresponding to each instrument. Any tool can be activated with the mouse. You can then change the tool settings in the mode changes panel. If there is a small triangle at the bottom of the button, there are several types of this tool. To see its types, it is necessary to hold this button not to release a little. Then you will see a list of tools. The main tools are collected in group 4 of the sign.
1. The Tools used for extracting images:
Tools panel.
The toolbar is the main tool for working with images. It consists of buttons corresponding to each instrument. Any tool can be activated with the mouse. You can then change the tool settings in the mode changes panel. If there is a small triangle at the bottom of the button, there are several types of this tool. To see its types, it is necessary to hold this button not to release a little. Then you will see a list of tools. The main tools are collected in group 4 of the sign.
1. The Tools used for extracting images:
 * Selection of rectangular zones
* Selection of ellipse zones
* Cross path separation
* Selection of the vertical path
* Selection of rectangular zones
* Selection of ellipse zones
* Cross path separation
* Selection of the vertical path
 Move (move) – move a given fragment to another location. Lasso-allows you to surround the desired part with the mouse.
The types of lasso:
Move (move) – move a given fragment to another location. Lasso-allows you to surround the desired part with the mouse.
The types of lasso:
 Polygon lasso tool-select a rectangular area. According to the magnetic lasso control, the division loop is automatically “attached”to the boundaries.
 Magic wand (magic wand) – selects a zone of continuous pixels of the same color.
 Move - allows you to move the selected zones.
2. Drawing tool:
Move - allows you to move the selected zones.
2. Drawing tool:
 pencil-pencil drawing
 airbrush painting with a soft edge nozzles
 brush (brush) - drawing with a brush of different shapes
 eraser
 stamp-copies part of the image to another. The Alt key allows you to select the desired location and copy the selected area with the mouse to another location.
 darken (darken) - blur picture
sharpness – increase the contrast bruise-drain color within the image (blurs)
darken (darken) - blur picture
sharpness – increase the contrast bruise-drain color within the image (blurs)
 lightening-reveal the color of the fragment
burn-make the fragment dark
sponge-reduced color saturation
lightening-reveal the color of the fragment
burn-make the fragment dark
sponge-reduced color saturation
 a gradient is the movement of the tool and the addition of colors to the selected area
fill-color continuous areas with the same colour.
3. Tools for creating new objects:
a gradient is the movement of the tool and the addition of colors to the selected area
fill-color continuous areas with the same colour.
3. Tools for creating new objects:
 The handle is used to create and edit a curved contour. This button is used to alternate instructions in the following way:
1. General positions arbitrary grip-with this tool, you can draw moves and arbitrary (arbitrary) paths.
2. add anchor point (add anchor point)
- the path segment of this tool is preceded by a dot.
3. delete anchor point (delete anchor point) – deletes a point without breaking the contour when you click over the contour.
4. change point (convert point) - change point type. Move a point and change it from an angle to an arc.
1.
The handle is used to create and edit a curved contour. This button is used to alternate instructions in the following way:
1. General positions arbitrary grip-with this tool, you can draw moves and arbitrary (arbitrary) paths.
2. add anchor point (add anchor point)
- the path segment of this tool is preceded by a dot.
3. delete anchor point (delete anchor point) – deletes a point without breaking the contour when you click over the contour.
4. change point (convert point) - change point type. Move a point and change it from an angle to an arc.
1.  text-use this tool to enter text and format it.
2.
text-use this tool to enter text and format it.
2.  3. draw a rectangle-rectangle.
4. a rounded rectangle is a rounded rectangle.
5. draws an ellipse.
6. polygon-draw a polygon
7. ine-draws a line.
8. to draw the oblique form oblique shape.
9.
3. draw a rectangle-rectangle.
4. a rounded rectangle is a rounded rectangle.
5. draws an ellipse.
6. polygon-draw a polygon
7. ine-draws a line.
8. to draw the oblique form oblique shape.
9.  eyedropper-click the eyedropper in a color in the video window, using that color as the image color.
4. Inspection and control tools:
· caption-used to move images displayed from the program window.
· zoom-work with the enlarged fragment.
At the bottom of the toolbar there is a button to select the main and background color by clicking on the corresponding square.
2 сурет. Palettes.
eyedropper-click the eyedropper in a color in the video window, using that color as the image color.
4. Inspection and control tools:
· caption-used to move images displayed from the program window.
· zoom-work with the enlarged fragment.
At the bottom of the toolbar there is a button to select the main and background color by clicking on the corresponding square.
2 сурет. Palettes.
 Palette is an auxiliary window in which the various operations on the video. Palettes are usually vertically arranged on 4 panels on the right edge. each panel has only one palette. The spine of the active palette is indicated by a light color. Like other Windows, panels can be placed elsewhere. If any panel is unclaimed, it can be closed or wrapped. When you click the arrow button, the command menu of the specified palette opens. You can use these commands to control the palette option. The first panel contains the Navigator and the info palette. They are designed to change the image size, and also stored information about the parameters of the selected instruments.
3 image.
Palette is an auxiliary window in which the various operations on the video. Palettes are usually vertically arranged on 4 panels on the right edge. each panel has only one palette. The spine of the active palette is indicated by a light color. Like other Windows, panels can be placed elsewhere. If any panel is unclaimed, it can be closed or wrapped. When you click the arrow button, the command menu of the specified palette opens. You can use these commands to control the palette option. The first panel contains the Navigator and the info palette. They are designed to change the image size, and also stored information about the parameters of the selected instruments.
3 image.
 On the second panel is a color directory palette and style. The first two are for selecting, creating, and editing colors, and the style palette is for text formatting. The following group includes the Layers, Channels, Paths, and Action History palettes. They provide work with layers and channels. It contains instructions about the last 20 operations performed, and allows you to write the name of multiple repetitive operations. You can stretch and shrink the selected area.
Corrective Foundation shade.
On the second panel is a color directory palette and style. The first two are for selecting, creating, and editing colors, and the style palette is for text formatting. The following group includes the Layers, Channels, Paths, and Action History palettes. They provide work with layers and channels. It contains instructions about the last 20 operations performed, and allows you to write the name of multiple repetitive operations. You can stretch and shrink the selected area.
Corrective Foundation shade.
 Means of tracking colors enable you to replace a poorly painted image in the open color. The hue of the video is characterized by the brightness of the pixel. They range from 0 to 255. The darkest shades correspond to 0, and the lightest shades-255. The pixel range of an image is called the hue range of the image. For each Photoshop image, you must run the image / histogram command.
On the horizontal axis is the value of light: from about to 255, and the vertical axis indicates the pixel size of each light level.
The shadow is the darkest part of the low-light image.
- light colors - the most open part of the image with high light. Between the shadow and the light shade is the middle shade.
Light value of different images:
* dark image histogram (most pixels have a low light value)
* open image histogram (most pixels have a high light value)
* matte image histogram (medium color)
The main task of color correction is to ensure the correct illumination of pixels in the image. Since the range of shades of the entered picture will be reduced with the help of the scanner,it is necessary to correct it.
Therefore, photos passed through the scanner are matte than the original. Photoshop runs the following command to correct the color. Image / settings. The command Brightness / worked in contrast causing the screen to 2 on the scale. Changing the brightness scale highlights the image as dark or dark. A controller is designed to change the accuracy of the image. The level command displays the histogram of the active image and the means to change the range of shades. Using the triangle in the lower right corner, you can change the dark or light color settings. This button is located under the histogram. To adjust, select the desired eyedropper and move the cursor to the appropriate area of the image. You can also run the Auto or Autolevel command. The Curves command opens a dialog box to correct the image to the screen.
Figure 5. Color balance correction.
Means of tracking colors enable you to replace a poorly painted image in the open color. The hue of the video is characterized by the brightness of the pixel. They range from 0 to 255. The darkest shades correspond to 0, and the lightest shades-255. The pixel range of an image is called the hue range of the image. For each Photoshop image, you must run the image / histogram command.
On the horizontal axis is the value of light: from about to 255, and the vertical axis indicates the pixel size of each light level.
The shadow is the darkest part of the low-light image.
- light colors - the most open part of the image with high light. Between the shadow and the light shade is the middle shade.
Light value of different images:
* dark image histogram (most pixels have a low light value)
* open image histogram (most pixels have a high light value)
* matte image histogram (medium color)
The main task of color correction is to ensure the correct illumination of pixels in the image. Since the range of shades of the entered picture will be reduced with the help of the scanner,it is necessary to correct it.
Therefore, photos passed through the scanner are matte than the original. Photoshop runs the following command to correct the color. Image / settings. The command Brightness / worked in contrast causing the screen to 2 on the scale. Changing the brightness scale highlights the image as dark or dark. A controller is designed to change the accuracy of the image. The level command displays the histogram of the active image and the means to change the range of shades. Using the triangle in the lower right corner, you can change the dark or light color settings. This button is located under the histogram. To adjust, select the desired eyedropper and move the cursor to the appropriate area of the image. You can also run the Auto or Autolevel command. The Curves command opens a dialog box to correct the image to the screen.
Figure 5. Color balance correction.
 An Image menu is available to change the position of the image. They consist of the following items:
* mode-allows you to adjust the mode of the edited image. If you set a different mode, the image results in a poor image state in this mode.
* settings - here you can change the color and color of the image. If you select, the action is performed only on the selected fragment.
A brief description of some of the Setup menu items:
* shades / saturation-the ability to mix colors.
* color balance-changes the composition of the primary colors.
* replace color-change any color in the picture.
D evices working with the object. A group of drawing tools.
· Purpose: to teach you how to work with drawing tools in Adobe Photoshop. Necessary tools and materials: PC, Adobe Photoshop. Content and order of work
· I. repetition of theoretical data;
· II. independent performance of exercises and analysis of results;
The first group of signs consists of an object and working devices. Area, with Lasso tools, you can select any area of the Video. Move (move) the device allows you to move and copy selected areas. Magic wand (amazing wand) device highlights the same colored areas. It is used for precise drawing of a complex clipping contour with a Lasso and an amazing wand.There are familiar Airbrush, Brush, Pencil, Eraser tools. Using the stamp tool, you can fix damaged image elements (old photos) by copying some part of the places where they were not destroyed. You can move the finger tool (finger) and the paint with a fresh application. The Blur/Sharpen tool, which can be selected alternatively, controls the color sharpness of individual parts. The Illuminator/dimmer/Bubka device is used to control the saturation and brightness of the local color.
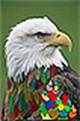
Exercise 1. Working with a magnetic lasso tool.
1.Launch the Adobe Photoshop app.
2.Eagle.extract the PSD file from the archive and open Adobe Photoshop.
An Image menu is available to change the position of the image. They consist of the following items:
* mode-allows you to adjust the mode of the edited image. If you set a different mode, the image results in a poor image state in this mode.
* settings - here you can change the color and color of the image. If you select, the action is performed only on the selected fragment.
A brief description of some of the Setup menu items:
* shades / saturation-the ability to mix colors.
* color balance-changes the composition of the primary colors.
* replace color-change any color in the picture.
D evices working with the object. A group of drawing tools.
· Purpose: to teach you how to work with drawing tools in Adobe Photoshop. Necessary tools and materials: PC, Adobe Photoshop. Content and order of work
· I. repetition of theoretical data;
· II. independent performance of exercises and analysis of results;
The first group of signs consists of an object and working devices. Area, with Lasso tools, you can select any area of the Video. Move (move) the device allows you to move and copy selected areas. Magic wand (amazing wand) device highlights the same colored areas. It is used for precise drawing of a complex clipping contour with a Lasso and an amazing wand.There are familiar Airbrush, Brush, Pencil, Eraser tools. Using the stamp tool, you can fix damaged image elements (old photos) by copying some part of the places where they were not destroyed. You can move the finger tool (finger) and the paint with a fresh application. The Blur/Sharpen tool, which can be selected alternatively, controls the color sharpness of individual parts. The Illuminator/dimmer/Bubka device is used to control the saturation and brightness of the local color.
Exercise 1. Working with a magnetic lasso tool.
1.Launch the Adobe Photoshop app.
2.Eagle.extract the PSD file from the archive and open Adobe Photoshop.
 1.after increasing the image size by 200-300% percent, move the image using a hand tool.
2.use the magnetic lasso tool to select individual Golden Eagle wings and use the fill tool to paint the wings in different colors.
3. The appearance after coloring the drawing will look like this:
1.after increasing the image size by 200-300% percent, move the image using a hand tool.
2.use the magnetic lasso tool to select individual Golden Eagle wings and use the fill tool to paint the wings in different colors.
3. The appearance after coloring the drawing will look like this:
 1. Exercise 2. Coloring a drawing using the amazing wand tool.
2.Launch the Adobe Photoshop app.
3.The pepper.extract the PSD file from the archive and open Adobe Photoshop.
1. Exercise 2. Coloring a drawing using the amazing wand tool.
2.Launch the Adobe Photoshop app.
3.The pepper.extract the PSD file from the archive and open Adobe Photoshop.
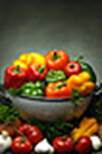 1. Image size increases by 200-300% percent, hands
  move the image using the tool.
2. Amazing wand
move the image using the tool.
2. Amazing wand  Fill, finish fruit with a tool
  use the tool to paint in different colors.
Exercise 3. Repair your drawing with the amazing wand tool.
1.Launch the Adobe Photoshop app.
2.Atheletic.jpg and landscape.extract the jpg files from the archive and open Adobe Photoshop.
use the tool to paint in different colors.
Exercise 3. Repair your drawing with the amazing wand tool.
1.Launch the Adobe Photoshop app.
2.Atheletic.jpg and landscape.extract the jpg files from the archive and open Adobe Photoshop.
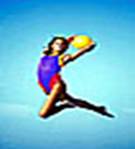
 1. Atheletic.jpg revealing picture and amazing wand
  2. Now you need to select only the girl. To do this, select the Selection ► Invert the selection command or the key combination <Ctrl>+ < Shift>+<I>.
 3. To save the selected object to the clipboard, click Edit > Copy (<Ctrl>+<C>). 4.landscape.go to the jpg file and paste the girl on this image page using the edit command ► Insert (<Ctrl>+<V>).
 4. Moving
  place the girl in the right place with the tool. Save your work.

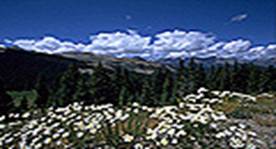
 3.Men.► Auto level adjustments (<Ctrl>+ < Shift>+ < L>).
 1. Amazing wand
  2. now run the following command: Select ► Modify ► Expand. In the window that appears, enter a value of 2 pixels.
 3. Now go to the file with the image of the mountain picture, run the Select all command (<Ctrl>+<A>) and copy it to the clipboard.
4. Men Again.go to the jpg image and perform Editing ► Paste to the command (<Ctrl>+ < Shift>+ < V>).
3. Now go to the file with the image of the mountain picture, run the Select all command (<Ctrl>+<A>) and copy it to the clipboard.
4. Men Again.go to the jpg image and perform Editing ► Paste to the command (<Ctrl>+ < Shift>+ < V>).
 5. merge layers by command: Layer ►Выполнить сведение.
Exercise 2. Using a gradient fill to a drawing.
1.Launch the Adobe Photoshop app.
2.Men.extract the jpg file from the archive and open the Adobe Photoshop file.
5. merge layers by command: Layer ►Выполнить сведение.
Exercise 2. Using a gradient fill to a drawing.
1.Launch the Adobe Photoshop app.
2.Men.extract the jpg file from the archive and open the Adobe Photoshop file.
 1.Men.► Auto level adjustments (<Ctrl>+ < Shift>+ < L>).
 Amazing wand
  1.
1.  no selection, Gradient
  select a tool.
2. Foreground and background colors use the tool to select a background color.
select a tool.
2. Foreground and background colors use the tool to select a background color.
 1. 1. use the following command to create a new layer: ► New Layer... (<Ctrl>+ < Shift>+ < N>) 2.Set the blending mode from the layers palette.
Brush
1. 1. use the following command to create a new layer: ► New Layer... (<Ctrl>+ < Shift>+ < N>) 2.Set the blending mode from the layers palette.
Brush  set the tool parameter as follows:
 6. Foreground and background colors
  2. Create a new layer on the layer where the image is located. ► New Layer... (<Ctrl>+ < Shift>+ < N>) 2.Set The color from the mix list to set the layer palette (Layers).
3. Brush
2. Create a new layer on the layer where the image is located. ► New Layer... (<Ctrl>+ < Shift>+ < N>) 2.Set The color from the mix list to set the layer palette (Layers).
3. Brush  4. Foreground and background colors of the required color
 1. 1.Image ► Mode ► run the Black and white command to change the image to black and black.
2. 2.Set The color from the mix list to set the layer palette (Layers).
3. Brush
1. 1.Image ► Mode ► run the Black and white command to change the image to black and black.
2. 2.Set The color from the mix list to set the layer palette (Layers).
3. Brush  1. Image ► Mode ► run the Black and white command to change the image to black and black.
2. Brush
1. Image ► Mode ► run the Black and white command to change the image to black and black.
2. Brush  use the tools to repair the image.
3. Image ► Adjustments ► run the Brightness/Contrast command and change the image color if necessary.
Exercise 1.
use the tools to repair the image.
3. Image ► Adjustments ► run the Brightness/Contrast command and change the image color if necessary.
Exercise 1.

 use the tool to set a circular shape in the upper-left corner of the drawing.

 use the device to set points, such as the image below.
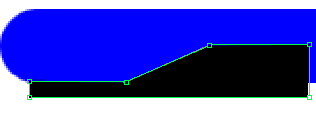
 remove the tool and stretch the points horizontally.
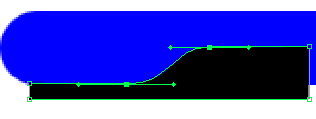
 select the area indicated by the tool (located in the Path palette). Now go to the layers palette, select the layer where the image is displayed, and click Delete.
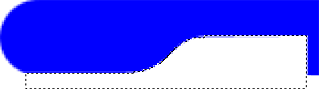
 use the tool to delete an unnecessary area.
 1. beach.To stretch the TIF image, press the <Q> key to switch to quick mask mode. 2. Replace the front surface and background with white and black.
 2. Gradient
  3. 3.after it is in quick mask mode, the white color looks transparent and the black color looks red
 5. 4.Press the <Q> button to switch to normal mode.
6. 5.after completing the above steps, half of the drawing differs in invisible pixels.
5. 4.Press the <Q> button to switch to normal mode.
6. 5.after completing the above steps, half of the drawing differs in invisible pixels.
 4. now draw the second picture. Select all or use the <Ctrl>+<A> command to select the entire picture.
5. Editing the selected image ► copy the selected image to the clipboard using the Copy command (<Ctrl>+<C>).
4. now draw the second picture. Select all or use the <Ctrl>+<A> command to select the entire picture.
5. Editing the selected image ► copy the selected image to the clipboard using the Copy command (<Ctrl>+<C>).
 6 Go back to the first picture and edit ► Paste In or (<Ctrl>+ < Shift>+<V>).
 7. merge layers using the command: Layer ► perform a merge.
Exercise 2. 2nd method of combining two drawings.
1.Launch the Adobe Photoshop app.
2.portrait.TIF and sea.Open the TIF files from the archive and open Adobe Photoshop. The dimensions of the two images must be the same.
7. merge layers using the command: Layer ► perform a merge.
Exercise 2. 2nd method of combining two drawings.
1.Launch the Adobe Photoshop app.
2.portrait.TIF and sea.Open the TIF files from the archive and open Adobe Photoshop. The dimensions of the two images must be the same.
 1. draw a file with the image of a girl.
 1. select the girl using the magnetic Lasso tool.
 2. Selection ► run the Blend command and modify the image (for example, 60).
3. copy the selected image to the clipboard Editing ► Copy (<Ctrl>+<C>).
4. go to the second photo and Edit it with Insert (<Ctrl>+<V>).
2. Selection ► run the Blend command and modify the image (for example, 60).
3. copy the selected image to the clipboard Editing ► Copy (<Ctrl>+<C>).
4. go to the second photo and Edit it with Insert (<Ctrl>+<V>).
 5. 1.Reduce the layer that shows the girl's photo.
 6. merge layers using the command: Layer ► perform a merge.
W orking with text
6. merge layers using the command: Layer ► perform a merge.
W orking with text
 record the label blood using the tool:


 .
. 


 selected color.


 don't Add a point
  use the tools to create a contour with a spray angle.


 take the tool, 3 pixels and light gray color.


 we can use it to highlight the flag as shown in the image.


 Өзіңіздің папкаңызда “фигуры” деп сақтаңыз.