Заглавная страница Избранные статьи Случайная статья Познавательные статьи Новые добавления Обратная связь КАТЕГОРИИ: ТОП 10 на сайте Приготовление дезинфицирующих растворов различной концентрацииТехника нижней прямой подачи мяча. Франко-прусская война (причины и последствия) Организация работы процедурного кабинета Смысловое и механическое запоминание, их место и роль в усвоении знаний Коммуникативные барьеры и пути их преодоления Обработка изделий медицинского назначения многократного применения Образцы текста публицистического стиля Четыре типа изменения баланса Задачи с ответами для Всероссийской олимпиады по праву 
Мы поможем в написании ваших работ! ЗНАЕТЕ ЛИ ВЫ?
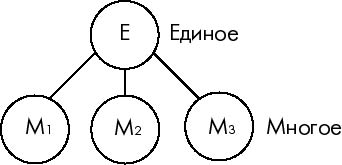
Влияние общества на человека
Приготовление дезинфицирующих растворов различной концентрации Практические работы по географии для 6 класса Организация работы процедурного кабинета Изменения в неживой природе осенью Уборка процедурного кабинета Сольфеджио. Все правила по сольфеджио Балочные системы. Определение реакций опор и моментов защемления |
Launch the Adobe Photoshop app.
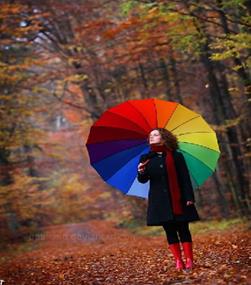
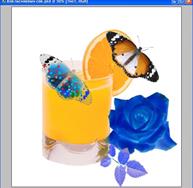
2.rain from my document package.select a jpg image.
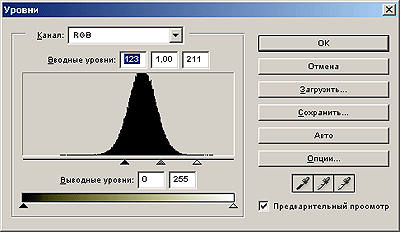
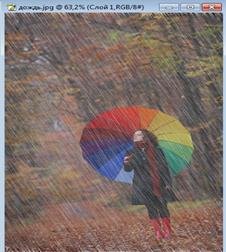
6. 5.select the filtered image: select -> complete all. 7. copy image: image - >copy 8. go to the first picture and set the filtered image. 9. press the Q key and go to the quick mask. 10. run the settings - > insert command. 11. press the Q key and quickly remove the mask.. 12. change the page color using the following command: Image ► Adjustments ► Levels: 14. Connect the pages to each other.
| ||||||
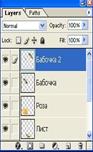
| C reating a multi-layer view. Working with layers. Goal: learn how to work with layers in Adobe Photoshop. Necessary tools and materials: PC, Adobe Photoshop. Content and order of work I. repetition of theoretical data; II. independent performance of exercises and analysis of results; III. delivery of laboratory work. | |||||||
1. 1. Exercise. Drawing up a new layer painting a butterfly.
1. specify a number of butterflies in the active view.
2. create a new layer by clicking the Create a new layer button, a new layer Layer 1 will appear on top of the butterfly layer. Click the Create a new layer button. The new layer has become active.
3. on the toolbar (brush), select the Bruch tool.
4. in the catalog palette, use the mouse to select any color.
5. click the left mouse button and color the context, insert your patterns on the butterfly wings.
6. If you encounter difficulties when drawing, use the History palette to remove optional operations or switch the last movements with the Ctrl+z key. a new layer with the expression keyboard will appear In the Layer palette.
 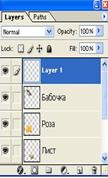 (1 сурет)
2. Exercise. Repeating layers to activate images, it is sometimes advisable to add several identical layers (identical images, stars, clouds, flowers, stones, etc.) And another butterfly.
(1 сурет)
2. Exercise. Repeating layers to activate images, it is sometimes advisable to add several identical layers (identical images, stars, clouds, flowers, stones, etc.) And another butterfly.
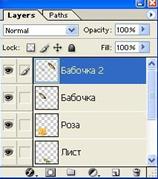  (2 сурет)
1. activate the butterfly layer.
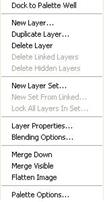
2. invite the Layers palette menu.
3. Select Duplicate Layers. The image of a repeating butterfly is placed on top of the original butterfly.
4. Add the Move tool to open a copy of the received document to the right and left.
5. set the butterfly theme 2.
(2 сурет)
1. activate the butterfly layer.
2. invite the Layers palette menu.
3. Select Duplicate Layers. The image of a repeating butterfly is placed on top of the original butterfly.
4. Add the Move tool to open a copy of the received document to the right and left.
5. set the butterfly theme 2.
  (3 picture)
3. Exercise. Linking layers.
If we move the butterfly layer now, the generated expression remains in its place. In order to place these two layers, we establish a link between them.
1.move 1 Layer Layer to the pattern.
2.select the butterfly layer.
3.Click the expression layer indexer to display the view in the Layers palette.
4.Add the tool Move (paste) the presence of a layer of the ornament associated with a butterfly.
5.make contact in the rose and leaf layers.
6.switch this connection to click again in the connection indicator.
4. Exercise. Changing the pixel mode.
1. Divide the rose layer
2.select the Exclusion command from the list of pixels. In this case, the color of the rose or other objects changes.
3.activate other layers, change the pixel setting mode. For example, select the multi-user mode (reproduction) for the 2nd butterfly layer, and for the ornament layer, select the Dissolve mode (reproduction).
5. Exercise. Working with image layers
1.make the pattern layer more active this layer is associated with the butterfly layer.
2.invite the layers palette menu and merge Linked (picking added) turns into a two-layer layer, file parameters are reduced.
3.Make the active layer of the rose.
1. 4.open the Layers palette menu and run the Merge Down command. At hand, I combine. The number of layers and file sizes are reduced
(3 picture)
3. Exercise. Linking layers.
If we move the butterfly layer now, the generated expression remains in its place. In order to place these two layers, we establish a link between them.
1.move 1 Layer Layer to the pattern.
2.select the butterfly layer.
3.Click the expression layer indexer to display the view in the Layers palette.
4.Add the tool Move (paste) the presence of a layer of the ornament associated with a butterfly.
5.make contact in the rose and leaf layers.
6.switch this connection to click again in the connection indicator.
4. Exercise. Changing the pixel mode.
1. Divide the rose layer
2.select the Exclusion command from the list of pixels. In this case, the color of the rose or other objects changes.
3.activate other layers, change the pixel setting mode. For example, select the multi-user mode (reproduction) for the 2nd butterfly layer, and for the ornament layer, select the Dissolve mode (reproduction).
5. Exercise. Working with image layers
1.make the pattern layer more active this layer is associated with the butterfly layer.
2.invite the layers palette menu and merge Linked (picking added) turns into a two-layer layer, file parameters are reduced.
3.Make the active layer of the rose.
1. 4.open the Layers palette menu and run the Merge Down command. At hand, I combine. The number of layers and file sizes are reduced
  (4 picture)
Note:
All visible layers are combined with the Megre Visible command with the Flatten Image command, multi-layer documents become single-layer documents. Background (color).
6. Exercise. Deleting layers
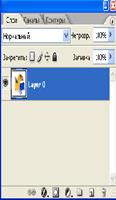
1.select the layer Layer 0.
2. Click the Delete Layer button, where garbage is displayed at the bottom of the Layers palette
3.confirm that you want to delete the layer. The layer is lost.
4.adding images of all layers open the layers menu palette and run the Flatten image command. In the Layers palette, only one layer is the Background layer.
(4 picture)
Note:
All visible layers are combined with the Megre Visible command with the Flatten Image command, multi-layer documents become single-layer documents. Background (color).
6. Exercise. Deleting layers
1.select the layer Layer 0.
2. Click the Delete Layer button, where garbage is displayed at the bottom of the Layers palette
3.confirm that you want to delete the layer. The layer is lost.
4.adding images of all layers open the layers menu palette and run the Flatten image command. In the Layers palette, only one layer is the Background layer.
| |||||||
The possibility of creating complex images
Goal: learn how to work with images in Adobe Photoshop.
Necessary tools and materials: PC, Adobe Photoshop.
Content and order of work
I. repetition of theoretical data;
II. independent performance of exercises and analysis of results;
III. delivery of laboratory work.
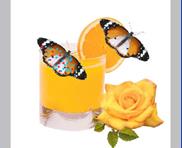
In order to open the possibility of creating complex images, we recommend that you perform the following algorithmic task.
The goal of the task is to get an advertising image on a given picture of a cow, that is, to surprise the cow's face, as well as perform special text-based summer works.
The algorithm of the job:
* Save the image to a new location. Open it in Photoshop.
* Use a distinctive tool, highlight an image, and perform actions to remove the green background color
* Leaving only the image of the cow's head, save it on an invisible background (transparent background) as a new layer called " cow”
Take a copy of the same layer and save it under the new name " cow copy" 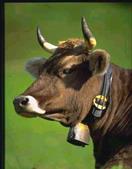
| |||||||
· * Create a new layer, bring the 2 arrows so that the beginning of their straight lines coincide with the bottom of the cow's eye.
·
· * Carefully draw a circle using the CTRL+ALT key combination, getting a special device for selecting an oval. The center of the circle fits exactly to the intersection point of the arrows.
· * Hold the ALT key until the " - " sign appears next to the cursor. Bring the center of the small circle to the point where the arrows intersect. In this case, we can do this using the ALT+CTRL key combination. As a result of these actions, we must divide the ring-shaped area.
· * We paint the ring with a beautiful color. We use the effect corresponding to the formation and provide a relief shape to the ring.
· * Use the ” magic wand " to select the invisible area around the picture of the cow and the actions performed by its coloring in white color.
· * Place the” copy of the cow drawing " layer in such a way that it is possible to arrive as quickly as possible.
· * Turn off the cow layer visibility mode ”
· * Use the eraser tool to remove a piece of the cow ring pattern.
· * Assign the visible mode to ” cow".
· * Write to the floor by holding a horizontal TSR. You can use the "hatching" effect for the outline around the letter.
· * Attach 300 pixels to the resulting image and,
·  Now, in this way, or using the above tools, actions, provide a layer effect for the image below жұмысын you can perform.
· This uses the Blur -/ Radial Blur filter for the background. Now, in this way, or using the above tools, actions, provide a layer effect for the image below жұмысын you can perform.
· This uses the Blur -/ Radial Blur filter for the background.
|
|||||||
|
|
Последнее изменение этой страницы: 2021-04-12; просмотров: 34; Нарушение авторского права страницы; Мы поможем в написании вашей работы! infopedia.su Все материалы представленные на сайте исключительно с целью ознакомления читателями и не преследуют коммерческих целей или нарушение авторских прав. Обратная связь - 3.135.201.209 (0.008 с.) |