Заглавная страница Избранные статьи Случайная статья Познавательные статьи Новые добавления Обратная связь КАТЕГОРИИ: ТОП 10 на сайте Приготовление дезинфицирующих растворов различной концентрацииТехника нижней прямой подачи мяча. Франко-прусская война (причины и последствия) Организация работы процедурного кабинета Смысловое и механическое запоминание, их место и роль в усвоении знаний Коммуникативные барьеры и пути их преодоления Обработка изделий медицинского назначения многократного применения Образцы текста публицистического стиля Четыре типа изменения баланса Задачи с ответами для Всероссийской олимпиады по праву 
Мы поможем в написании ваших работ! ЗНАЕТЕ ЛИ ВЫ?
Влияние общества на человека
Приготовление дезинфицирующих растворов различной концентрации Практические работы по географии для 6 класса Организация работы процедурного кабинета Изменения в неживой природе осенью Уборка процедурного кабинета Сольфеджио. Все правила по сольфеджио Балочные системы. Определение реакций опор и моментов защемления |
Contour and casting processing ⇐ ПредыдущаяСтр 10 из 10
| ||
In CorelDraw, each object has two main attributes:
Outline(contour), Fill (casting). A contour or outline is a ruler that defines the shape of an object. Defines the color parameters of the zone bounded by the filling contour. Refueling is performed only on closed objects.
Setting parameters for contour
-In the Outline Pen window, click the Outline Pen button that opens with an interview.
 The loop parameters:
Color-the color of the outline
Width-thickness of the contour line
Style-the outline style
Edit Style-create your own style for lines
Corners-type of contour in bent places
Caps line-type of line ends
Arrows-arrows))
Calligraphy-calligraphy (setting a line underlined with a pen or brush))
Whether or not Behind Fill is determined-the contour is inserted above the fill. If the path is on the fill, the thickness of the contour is reduced by half
Scale with image-scaling with an object
The use of casting
The Fill palette is used to set the object's filling parameters.
1.Uniform Fill – single-color casting (uniform fill).
2.Fountain Fill Dialog – casting of the gradient.
Gradient casting parameters:
* Type-defines the type of gradient casting: Linear (linear), Radial (radial), conical (conical), sguare (square).
* Center Offat-deviation of the gradient environment.
* Angle-defines the initial angle of the gradient.
* Steps - (ball) number of steps 256 max
* Edge pad-retreat from the edge of the object.
Color mixing is performed in two modes:
* Two Color (two-color)
* Custom (custom)
In the Two Color mode using two color.
Mid Point (mid-point) defines the boundaries of the color transition.
In user mode, you can enable an unlimited number of colors for gradient casting.
Fountain Fill Dialog-gradients installed with the CorelDraw package in the lower part of the interview window: you can use the "+" list button to create a gradient list created by the user. sign" -»
4. Texture Fill Dialog-casting with a texture.
Parameters:
1.Texture library-list for selecting different texture libraries.
2. style-a group of parameters for changing the appearance of a texture.
3.Preview –preview.
4.Tiling-overlay.
5.using Options – you can configure texture rasterization parameters.
* Bitmap resolution - resolution of the raster ornament.
* Maximum file width-specifies the number of pixels.
Using texture casting, displaying the image on the screen, and slowing down printing on paper.
6.Post Script Fill Dialog – this type of filling is similar to a texture, but it is not converted to a bitmap during the manufacturing process on paper. In this case, the printer must use the Post Script language (page description).
Control question:
1. 1. How many types of filling exist in Soreldraw?
2. 2. what are the Eyedropper and Paintbucket tools used for?
3. 3.Describe the Outline Pen chat window.
4. Task
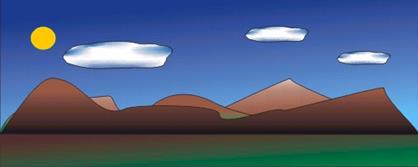
5. Insert the images below using the casting capabilities in CorelDraw:
The loop parameters:
Color-the color of the outline
Width-thickness of the contour line
Style-the outline style
Edit Style-create your own style for lines
Corners-type of contour in bent places
Caps line-type of line ends
Arrows-arrows))
Calligraphy-calligraphy (setting a line underlined with a pen or brush))
Whether or not Behind Fill is determined-the contour is inserted above the fill. If the path is on the fill, the thickness of the contour is reduced by half
Scale with image-scaling with an object
The use of casting
The Fill palette is used to set the object's filling parameters.
1.Uniform Fill – single-color casting (uniform fill).
2.Fountain Fill Dialog – casting of the gradient.
Gradient casting parameters:
* Type-defines the type of gradient casting: Linear (linear), Radial (radial), conical (conical), sguare (square).
* Center Offat-deviation of the gradient environment.
* Angle-defines the initial angle of the gradient.
* Steps - (ball) number of steps 256 max
* Edge pad-retreat from the edge of the object.
Color mixing is performed in two modes:
* Two Color (two-color)
* Custom (custom)
In the Two Color mode using two color.
Mid Point (mid-point) defines the boundaries of the color transition.
In user mode, you can enable an unlimited number of colors for gradient casting.
Fountain Fill Dialog-gradients installed with the CorelDraw package in the lower part of the interview window: you can use the "+" list button to create a gradient list created by the user. sign" -»
4. Texture Fill Dialog-casting with a texture.
Parameters:
1.Texture library-list for selecting different texture libraries.
2. style-a group of parameters for changing the appearance of a texture.
3.Preview –preview.
4.Tiling-overlay.
5.using Options – you can configure texture rasterization parameters.
* Bitmap resolution - resolution of the raster ornament.
* Maximum file width-specifies the number of pixels.
Using texture casting, displaying the image on the screen, and slowing down printing on paper.
6.Post Script Fill Dialog – this type of filling is similar to a texture, but it is not converted to a bitmap during the manufacturing process on paper. In this case, the printer must use the Post Script language (page description).
Control question:
1. 1. How many types of filling exist in Soreldraw?
2. 2. what are the Eyedropper and Paintbucket tools used for?
3. 3.Describe the Outline Pen chat window.
4. Task
5. Insert the images below using the casting capabilities in CorelDraw:


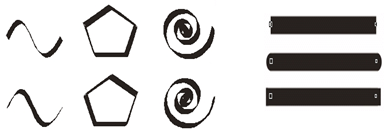
 1. 1. Insert the following videos using the functions of the OutlinePen window:
2. 3. 4. 5. 6. 7. 8.
| |||
C reating a layout
1. Creating a layout is the setting of page layout parameters and layout elements (text, bitmaps, and vector images)for the designer's game. When creating a new document, CorelDraw automatically sets the A4 format (210x297 mm). If you need to change the format, select the desired format from the list of open formats or set the volume required for the corresponding field in the properties palette. To fully customize the page layout, run the Tools > Options command and open the Document > page. There are 4 items on this page:
2. Size (volume) – in this item, you can configure the page parameter. You can view your changes in the preview window.
3. Logout (layout) – use the Logout list that opens at this point to select one of the 6 templates:
4. Full Page (full page)
5. * Book (book)
6. * Book Let (booklet)
7. * Tent Card (Postcard)
8. * Side Fold (card with a side fold)
* Top Fold Card (top fold card)
Changing the layout is displayed in the preview window. Use the Facing Page flag for two-sided printing.
Start on a list (to start with...) the number of the first page determines what will be even or odd.
3.Label allows you to select a sticker from a package of more than 800 standard stickers that are included with the CD. If you don't have the correct version, click the Customize Label split button and the distribution parameters are displayed in the dialog box that opens.
4.Background – this item allows you to select the page background. You can use the switches to select 3 options.
* No Background (no background)
* Solid (single color background)
* Bitmap (video in bitmap format).
9. Print and Export Background the flag allows you to export and print the background on paper. If the flag is not set, the background is displayed on the screen, not printed on paper, and not stored when exporting.
Object Manager using the window (object Manager). When working with complex documents, the Object Manager window is used for easy navigation between objects. In this window, all the pages, layers, and objects in the document are arranged in a hierarchy. You can use this window to change the location of objects on the floor. You can select objects, group them, copy them, and change the outline color. To open this window, you must run the command Window > Docker > Object Manager. In the Object Manager window, the selected object is also different in the work area. By default, each layer (Lauer) is denoted by an ordinal number. The user can change the layer name. To do this, double-click on the floor name.
The source icon to the left of the layer name affects the invisibility of objects located on this floor. The printer icon allows or disables printing on paper objects located on this floor. The pencil mark allows or disables processing of objects located on this floor. To determine what information is displayed in the window and change the document, use the following controls.
Show Object Property (specify object properties) - information about the object is recorded next to the object name (color and thickness of the contour, fill color).
Edit Across Layer processing between layers allows you to process an object on any floor, regardless of which layer is selected in the window.
Layer Manager View (type Manager) – when using this mode, only layers are displayed in the window.
New Layer - create a new empty floor
New Master Layer - this creates a new template page.
Delete – deletes the selected layer, object, or group of objects.
You can run the Move to Layer or Copy to Layer window menu commands to move an object from one floor to another or get a copy.
Align and pin objects
Click the Snap to Grid button to start the grid alignment mode. To configure the grid, you can run the Tools > Options command and configure it in the Document Grid window. Freguency - frequency, frequency) - sets the frequency of grid lines, which falls horizontally and vertically per unit of measurement. Spacing – distance) - grid step. Show Grid - display or delete the grid. Snap to Grid-attaches the grid to lines. Show Grid as Lines (show grid lines with points). Show Grid Dots (show the grid line as a point)
To create a high-quality document, for a fast and high level of work, you must follow certain rules. To create a layout for complex documents, follow these tips.
1. Document planning-that is, to determine what purpose the video is created for and what the final result will be.
 2. drawing a sketch-Before starting work on paper, indicating the location of graphics and text elements
Draw a colored circle and get a copy 8 times. Use the Smudge tool to shape the circles as follows: 2. drawing a sketch-Before starting work on paper, indicating the location of graphics and text elements
Draw a colored circle and get a copy 8 times. Use the Smudge tool to shape the circles as follows:

 Working with layers
| |||
| The layers are similar to a transparent film in which the illustration is represented by objects. How many of these layers can be made and managed separately. Layers on paper are stacked in a collection. Corel Draw also allows you to define composite connected groups of objects. You can make a layer so that it is not temporarily visible, or not print it unprinted. It is enough to lock (lock) this layer to not change the content of this layer(not to violate). Complex illustration Finishing works on the floors greatly simplify and create a structure. Next to the layer icon is the icon of its attributes. The eye icon allows you to control the layer view attribute. When the layer is visible, the icon will be black,and when it is invisible, it will be gray. The printer in the right icon represents the printed attribute. If the icon is black, then when documents are released to the printer, objects located on this floor are printed, if gray is not printed. The pencil icon allows you to pin the layer and make it in a non-transferable state. The most convenient way is to place bulk objects on separate floors, while all floors can be fixed together with the objects located above, and avoid difficulties marking objects under them. Layer templates You can use Corel Draw not only to create a blank Fax, but also to create the Fax itself by entering paper text on your computer. Template-a layer where the content is automatically copied to all pages of the document. The user must place elements of the document that will be updated on a separate floor and declare it as a sample. If you need to get two series of differences from each other, you can put them in one file, only in this case you need a template. Corel Draw places all template layers on a single template page. Template pages are located at the bottom of the list. If the file was created again and is empty, three templates are automatically executed on the page: grid(grid), directional (guides), and desktop (desktop). This is due to the fact that the grids and guides have the same surface, that they are made on the floor. There is nothing on the template page except three standard templates. Routers are the only floor model that has objects created by users. Click the " + " icon next to the guide layer icon.You will see a list of guides available in the document.Specify the icon for any guide. It protrudes from the document mounted on the surface. Routers for Corel Draw are objects like others that have arrived. If you click the mouse on the printer icon and click on the guide layer, create a document that will print the guide layer first, and you can print the document with the guides first. It is very convenient for blak to be on the sample floor. If you need to make changes to the form, you do not need to create each copy and on each page-just change the sample. |

|
|
|
|
List of references
1. Rose K. Mastered CorelDraw 5.5 on her own in 24 hours.
2. Lucius S. Studying Photoshop: the World, 2001
3. S. Lucius Studying Photoshop St. Petersburg, 2002
4. Shikin E. V. Computer graphics / E. V. Shikin, A.V. Boreskov.
5. A. Alekseev CorelDraw 2000: a special reference book. Peter. Two thousand one
6. Barchard B. CorelDraw 2000. Inner life. Kiev, Diasoft, 2000
7. Omura J CorelDraw 2000. Bestseller. Moscow, Lori, 1999.
8. Omura George. CorelDraw 2000. Reference guide. Moscow, 2000