Заглавная страница Избранные статьи Случайная статья Познавательные статьи Новые добавления Обратная связь FAQ Написать работу КАТЕГОРИИ: ТОП 10 на сайте Приготовление дезинфицирующих растворов различной концентрацииТехника нижней прямой подачи мяча. Франко-прусская война (причины и последствия) Организация работы процедурного кабинета Смысловое и механическое запоминание, их место и роль в усвоении знаний Коммуникативные барьеры и пути их преодоления Обработка изделий медицинского назначения многократного применения Образцы текста публицистического стиля Четыре типа изменения баланса Задачи с ответами для Всероссийской олимпиады по праву 
Мы поможем в написании ваших работ! ЗНАЕТЕ ЛИ ВЫ?
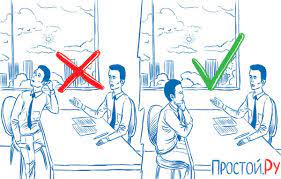
Влияние общества на человека
Приготовление дезинфицирующих растворов различной концентрации Практические работы по географии для 6 класса Организация работы процедурного кабинета Изменения в неживой природе осенью Уборка процедурного кабинета Сольфеджио. Все правила по сольфеджио Балочные системы. Определение реакций опор и моментов защемления |
Primaris Psyker (Level 1) — 32 points Psyker Champion (Level 2) — 69 points Psyker Master (Level 3) — 110 points Psyker Lord (Level 4) — 157 pointsСодержание книги
Поиск на нашем сайте
Wears no armour. Armed with a sword (232). Has a Mastery Level (36) as listed; select powers from the Adeptus (38) list. Deployed as part of a Command Squad (105); the psyker must remain with this squad and may not operate independently. Psyker Lords must be part of the Command HQ (109). Options May choose weapons from the Assault List 107).
Commissar Points (0-Nx)
Wears no armour. Armed with a Laspistol (240) and a sword (232). Immune to all psychology (47). You may include one Commissar for each Command Squads (105) present. Commissars may join and lead any Imperial Guard squad or they may act independently. Options May purchase Assault (107) and Command (107) weapons. May carry up to 2 Wargear Cards (14).
Unique Characters <25%
Solar Macharius, Lord Commander Points
Wears Carapace Armour (4+ save). Armed with a Bolt Pistol (240) and Chainsword (230). Immune to psychology (47) and automatically passes any Leadership test (47). Any Imperial Guard within 12" may take use his Leadership for any Break tests (47). When he charges (23), Macharius adds +D6 to his Combat Score. If present, he must be your army commander; he has a Strategy Rating (8) of D6. Options May carry up to 3 Wargear Cards (14). Special Rules If the Strategy Rating roll is 4-6, no barrages (106) is permitted before the game begins. If the roll is a 6, all reserves (105) must be deployed immediately — before the game begins.
Commissar Yarrick Points, 170 points including special wargear (0-1x)
Wears Carapace Armour (4+ save), and is armed with a StormBolter (229) and a Laspistol (240). Provides a Strategy Rating (8) of 2. Commissars are immune to psychology (47). A squad which includes Commissar Yarrick will automatically pass any Leadership test (47) it is required to take. Additionally, any Imperial Guard
unit which has line of sight to Yarrick and Yarrick is closer to the enemy than the unit, that unit will also automatically pass any Leadership-based tests required of it. If Yarrick suffers a hit which reduces him to 0 Wounds or less, roll a D6; on a 1-3, Yarrick receives an additional Wound and may keep fighting. Make this check every time Yarrick suffers damage that would otherwise be terminal. Options Yarrick may carry up to 3 Wargear Cards; these will always be the Bale Eye (206), a Force Field (211), and the Battle Claw (206).
Nork Deddog, Ogryn Bodyguard Points (0-1x)
Nork wears Carapace Armour (4+ save), and is equipped with a Ripper Gun (228) and Frag (256) grenades. Nork may be assigned to a Commander or Commissar model, and must stay within 2" of him at all times. Any shooting hit on the commander he protects may be taken by Deddog if he is within 2". You may decide whether to work out the shot against Deddog or against his commander.
Captain Al‟Rahem of Tallarn +25 points including Wargear (0-1x)
You may upgrade the Captain of a Command HQ (109) squad to Al‘Rahem for the points cost shown above. Al‘Rahem is armed with a Plasma Pistol (241) with a Targeter (221, +1 to hit), a Power Sword (232), and the Claw of the Desert Tigers (208), and wears Carapace Armour (4+ save).
Captain Chenkov of Valhalla +40 points including Wargear (0-1x)
You may upgrade the Captain of a Command HQ (109) squad to Chenkov for the points cost shown above. Chenkov is armed with a Bolt Pistol (240), Power Sword (232), Frag and Krak (256) grenades, and wears Carapace Armour (4+ save). At the start of a game in which Chenkov is in your army, roll a D6; this is the number of re-rolls against Leadership-based tests you are allowed during the course of the game. In addition, so long as Chenkov is alive, one re-roll is added every time the enemy receives Victory Points (13) for wiping out or breaking a unit. Options Chenkov is allowed up to 2 Wargear Cards (14).
Captain Mogul Kamir +29 points including Wargear (0-1x)
You may replace the Lieutenant of a Rough Rider Command Squad (109) with Captain Kamir for the cost shown above; the squad now functions as a Command HQ (109). Provides a Strategy Rating (8) of 2. Kamir is armed with a Hunting Lance (232), a Bolt Pistol (240), Laspistol (240), Frag and Krak (256) grenades, and wears Carapace Armour (4+ save). He also comes with 2 wargear items: the Eye of the Falcon (211, +1 to hit) and the Crushing Arm of Kamir (208).
Stumper Muckstart, Ratling Sharpshooter Points (0-1x)
Wears Flak Armour (105, 6+ save). Armed with a Needle Sniper Rifle (227). May infiltrate (13). At the start of the Shooting Phase (27), roll a D3 to determine how many shots Stumper may fire that turn. These shots can be directed against any enemy target within range and line-of-sight, regardless of which models are the closest. As
an alternative to firing D3 separate shots, Stumper may fire a single shot which reduces his target‘s armour save by a further D3 (e.g., from -2 to –4).
Battle Line 25%+
Squads
Imperial Guard Squad Points
Includes 1 Sergeant and 9 Guardsmen, all with the stats listed above. Each model comes with Flak Armour (105, 6+ save) and Frag (256) grenades. The Guardsmen each have a Lasgun (226), while the Sergeant carries a Laspistol (240) and a sword (232). Options The sergeant may purchase from the Assault (107) weapons list. One Guardsmen may purchase an Assault (107) or Special (107) weapon. The squad may be upgraded to veteran status by taking one Veteran Ability (108). The squad may ride in a Chimera (116) for +140 points; the Chimera crew (13) is unaffected by this squad‘s Veteran upgrade. Two of the Guardsmen may form a Heavy Weapons Team (105); select one weapon from the Heavy Weapons (107) list.
Heavy Weapon Squad Points
Includes 6 Guardsmen, which may be broken in to 1 to 3 Heavy Weapons Squads (105). All wear Flak Armour (105, 6+ save). All have Lasguns (226) and Frag (256) grenades. Options Each Heavy Weapons Squad may select one Heavy Weapon (107). The entire unit may be upgraded to veteran status by selecting one Veteran Ability (108). The squad may ride in a Chimera (116) for +140 points; the Chimera crew (13) is unaffected by this squad‘s Veteran upgrade.
Rough Rider Squad Points
Includes 1 Sergeant and 4 Rough Riders, all of whom share the same stats as listed above. All models wear Flak Armour (105, 6+ save) and come with Hunting Lances (232), Laspistols (240), Chainswords (230) and Frag (256) grenades. May fight in dispersed formation (12). Options The entire unit may be upgraded to veteran status by selecting one Veteran Ability (108).
Ogryn Squad Points
Includes 5 Ogryns, each wearing Flak Armour (105, 6+ save). All come with Ripper Guns (228) and Frag (256) grenades. Ogryns cause Fear (47). Options Any model may upgrade its armour to Mesh Armour (5+ save) for +3 points per model. The entire unit may be upgraded to veteran status by selecting one Veteran Ability (108).
Ratling Sniper Squad Points
Includes 5 Ratling Snipers, each wearing Flak Armour (105, 6+ save) and armed with a Needle Sniper Rifle (227). Options The entire unit may be upgraded to veteran status by selecting one Veteran Ability (108).
Storm Trooper Squad Points
Includes 1 Sergeant and 9 Stormtroopers, all of whom share the above stats. All wear Flak Armour (105, 6+ save). The Guardsmen carry Hotshot Lasguns (226), while the Sergeant carries a Hotshot Laspistol (240) and a sword (232). All have Frag (256) grenades. The squad must upgraded to veteran status by purchasing one Veteran Ability (108); all Stormtroopers are veterans. Options The sergeant may purchase from the Assault weapons (107) list. Up to one Guardsmen may swap his Lasgun for a weapon from the Special (107) or Assault (107) lists. The squad may be equipped with Krak (256) grenades for +30 points. The squad may ride in a Chimera (116) for +140 points; the Chimera crew (13) is unaffected by this squad‘s Veteran upgrade. You may form two of the Guardsmen into a Heavy Weapons Team (105), each with a single Heavy Weapon (107).
Vehicles
Vehicle Crews Included in vehicle cost All Imperial vehicles come with a crew (13) of Guardsmen, all of whom have the following stats:
Each crewman wears Flak Armour (105, 6+ save) and has a Laspistol (240).
Leman Russ Battle Tank Points Tracked Vehicle (25). Includes a crew (113) of 1 Driver and 4 Gunners. All vehicle weapons come with a Targeter (221, +1 to hit). Weapons One Heavy Bolter (234) one each side with a 180° arc to the appropriate side; one Lascannon (235) with a 90° forward arc, and a Battlecannon (242) in the turret with a 360° arc of fire.
Ram |
Speed |
| ||||||||||||||||||||||||||||||||||||||||||||||||||||||||||||||||||||||||||||||||||||||||||||||||||||||||||||||||||||||||||||||||||||||||||||||||||||||||||||||||||||||||||||||||||||||||||||||||||||||||||||||||||||||||||||||||||||||||||||||||||||||||||||||||||||||||||||||||||||||||||||||||||||||||||||||||||||||||||||||||||||||||||||||||||||||||||||||||||||||||||||||||||||||||||
| Str | Dmg | Save Mod | Slow | Combat | Fast | ||||||||||||||||||||||||||||||||||||||||||||||||||||||||||||||||||||||||||||||||||||||||||||||||||||||||||||||||||||||||||||||||||||||||||||||||||||||||||||||||||||||||||||||||||||||||||||||||||||||||||||||||||||||||||||||||||||||||||||||||||||||||||||||||||||||||||||||||||||||||||||||||||||||||||||||||||||||||||||||||||||||||||||||||||||||||||||||||||||||||||||||||||||||||
| 8 | D12 | -5 | 5‖ | 10‖ | 20‖ | ||||||||||||||||||||||||||||||||||||||||||||||||||||||||||||||||||||||||||||||||||||||||||||||||||||||||||||||||||||||||||||||||||||||||||||||||||||||||||||||||||||||||||||||||||||||||||||||||||||||||||||||||||||||||||||||||||||||||||||||||||||||||||||||||||||||||||||||||||||||||||||||||||||||||||||||||||||||||||||||||||||||||||||||||||||||||||||||||||||||||||||||||||||||||
|
| Armour |
| |||||||||||||||||||||||||||||||||||||||||||||||||||||||||||||||||||||||||||||||||||||||||||||||||||||||||||||||||||||||||||||||||||||||||||||||||||||||||||||||||||||||||||||||||||||||||||||||||||||||||||||||||||||||||||||||||||||||||||||||||||||||||||||||||||||||||||||||||||||||||||||||||||||||||||||||||||||||||||||||||||||||||||||||||||||||||||||||||||||||||||||||||||||||||||
| D6 | Location | Front | Side/Rear | ||||||||||||||||||||||||||||||||||||||||||||||||||||||||||||||||||||||||||||||||||||||||||||||||||||||||||||||||||||||||||||||||||||||||||||||||||||||||||||||||||||||||||||||||||||||||||||||||||||||||||||||||||||||||||||||||||||||||||||||||||||||||||||||||||||||||||||||||||||||||||||||||||||||||||||||||||||||||||||||||||||||||||||||||||||||||||||||||||||||||||||||||||||||||||
| 1 | Track | 16 | 16 | ||||||||||||||||||||||||||||||||||||||||||||||||||||||||||||||||||||||||||||||||||||||||||||||||||||||||||||||||||||||||||||||||||||||||||||||||||||||||||||||||||||||||||||||||||||||||||||||||||||||||||||||||||||||||||||||||||||||||||||||||||||||||||||||||||||||||||||||||||||||||||||||||||||||||||||||||||||||||||||||||||||||||||||||||||||||||||||||||||||||||||||||||||||||||||
| 2-3 | Hull | 22 | 18 | ||||||||||||||||||||||||||||||||||||||||||||||||||||||||||||||||||||||||||||||||||||||||||||||||||||||||||||||||||||||||||||||||||||||||||||||||||||||||||||||||||||||||||||||||||||||||||||||||||||||||||||||||||||||||||||||||||||||||||||||||||||||||||||||||||||||||||||||||||||||||||||||||||||||||||||||||||||||||||||||||||||||||||||||||||||||||||||||||||||||||||||||||||||||||||
| 4 | Heavy Bolter | 17 | 17 | ||||||||||||||||||||||||||||||||||||||||||||||||||||||||||||||||||||||||||||||||||||||||||||||||||||||||||||||||||||||||||||||||||||||||||||||||||||||||||||||||||||||||||||||||||||||||||||||||||||||||||||||||||||||||||||||||||||||||||||||||||||||||||||||||||||||||||||||||||||||||||||||||||||||||||||||||||||||||||||||||||||||||||||||||||||||||||||||||||||||||||||||||||||||||||
| 5-6 | Turret | 25 | 22 | ||||||||||||||||||||||||||||||||||||||||||||||||||||||||||||||||||||||||||||||||||||||||||||||||||||||||||||||||||||||||||||||||||||||||||||||||||||||||||||||||||||||||||||||||||||||||||||||||||||||||||||||||||||||||||||||||||||||||||||||||||||||||||||||||||||||||||||||||||||||||||||||||||||||||||||||||||||||||||||||||||||||||||||||||||||||||||||||||||||||||||||||||||||||||||
| D6 | Track Damage Table | ||||||||||||||||||||||||||||||||||||||||||||||||||||||||||||||||||||||||||||||||||||||||||||||||||||||||||||||||||||||||||||||||||||||||||||||||||||||||||||||||||||||||||||||||||||||||||||||||||||||||||||||||||||||||||||||||||||||||||||||||||||||||||||||||||||||||||||||||||||||||||||||||||||||||||||||||||||||||||||||||||||||||||||||||||||||||||||||||||||||||||||||||||||||||||||
| 1 | May only move at Slow speed for the rest of the game. | ||||||||||||||||||||||||||||||||||||||||||||||||||||||||||||||||||||||||||||||||||||||||||||||||||||||||||||||||||||||||||||||||||||||||||||||||||||||||||||||||||||||||||||||||||||||||||||||||||||||||||||||||||||||||||||||||||||||||||||||||||||||||||||||||||||||||||||||||||||||||||||||||||||||||||||||||||||||||||||||||||||||||||||||||||||||||||||||||||||||||||||||||||||||||||||
| 2-5 | Track is blown off; tank moves Out of Control (26) next turn and then comes to a halt for the rest of the game. | ||||||||||||||||||||||||||||||||||||||||||||||||||||||||||||||||||||||||||||||||||||||||||||||||||||||||||||||||||||||||||||||||||||||||||||||||||||||||||||||||||||||||||||||||||||||||||||||||||||||||||||||||||||||||||||||||||||||||||||||||||||||||||||||||||||||||||||||||||||||||||||||||||||||||||||||||||||||||||||||||||||||||||||||||||||||||||||||||||||||||||||||||||||||||||||
| 6 | Blown off; resulting damage flips the vehicle over. Wreck comes to rest D6” away in a | ||||||||||||||||||||||||||||||||||||||||||||||||||||||||||||||||||||||||||||||||||||||||||||||||||||||||||||||||||||||||||||||||||||||||||||||||||||||||||||||||||||||||||||||||||||||||||||||||||||||||||||||||||||||||||||||||||||||||||||||||||||||||||||||||||||||||||||||||||||||||||||||||||||||||||||||||||||||||||||||||||||||||||||||||||||||||||||||||||||||||||||||||||||||||||||

| random direction; any model it lands on takes D6 S7 hits with a –2 save modifier. Roll a D6 for each model on board; on a 4+, they are slain. Surviving models may disembark (26) as per normal rules. | |
| D6 | Hull Damage Table |
| 1 | Lascannon is destroyed. |
| 2-3 | Roll a D6 for each crew member; on a 4+ they are slain. |
| 4 | Engine explodes, killing crew instantly. Tank is spun around to face a random direction, then comes to a halt for the rest of the game. |
| 5 | Fuel tank explodes, killing all models on board. Vehicle goes out of control (26) next turn and then explodes; every model within 3" suffers a hit from a Heavy Flamer (235). |
| 6 | Ammunition explodes; tank is destroyed and any models within 3” suffer D6 S10 hits with a –3 save modifier. |
| D6 | Heavy Bolter Damage Table |
| 1 | Bolter is damaged and may only be fired if you first roll a 4+ on D6. |
| 2-5 | Bolter is destroyed. |
| 6 | Bolter is destroyed — but a flashback explosion forces a roll on the Hull Damage Table above. |
| D6 | Turret Damage Table |
| 1 | Battlecannon is damaged and may only be fired if you first roll a 4+ on D6. |
| 2 | Turret is jammed, and may no longer rotate. Battlecannon may only fire in a straight line at targets that are directly in front of it. |
| 3 | Turret gunner is slain. |
| 4-6 | Ammunition explodes; the tank is destroyed. All crew are slain and the turret is blown off, flying 2D6” in a random direction; anything under the spot where it lands suffers D6 S9 hits with a –6 save modifier. |
Leman Russ Demolisher Siege Tank
190 points + sponson armament
Tracked Vehicle (25). Includes a crew (113) of 1 Driver and 4 Gunners. All vehicle weapons come with
Targeters (221, +1 to hit).
Weapons
Mounts a Lascannon (235) with a 90° forward arc of fire, and a Demolisher Cannon (242) in the turret with a 360° arc of fire.
Options
Both sponsons must contain the same weapon: Heavy Bolters (234) for +30 points, MultiMeltas (236) for +90
points, or Heavy Plasma Guns (235) for +60 points. Each has a 180° arc to the side.
|
Ram |
Speed |
| |||||||
| Str | Dmg | Save Mod | Slow | Combat | Fast | ||||
| 9 | D20 | -6 | 4‖ | 8‖ | 16‖ | ||||
|
| Armour |
| |||||||
| D6 | Location | Front | Side/Rear | ||||||
| 1 | Track | 17 | 17 | ||||||
| 2-3 | Hull | 22 | 20 | ||||||
| 4 | Side Sponson | 18 | 18 | ||||||
| 5-6 | Turret | 25 | 22 | ||||||
| D6 | Track Damage Table | ||||||||
| 1 | May only move at Slow speed for the rest of the game. | ||||||||
| 2-5 | Track is blown off; tank moves Out of Control (26) next turn and then comes to a halt for the rest of the game. | ||||||||
| 6 | Track is blown off; secondary explosion forces a roll on the Hull Damage Table below. | ||||||||
| D6 | Hull Damage Table | ||||||||
| 1 | Lascannon is destroyed. | ||||||||
| 2-3 | Roll a D6 for each crew member; on a 4+ they are slain. | ||||||||
| 4 | Engine explodes, killing crew instantly. Tank is spun around to face a random direction, then comes to a halt for the rest of the game. |
| 5 | Fuel tank explodes, killing all models on board. Vehicle goes out of control (26) next turn and then explodes; every model within 3" suffers a hit from a Heavy Flamer (235). |
| 6 | Ammunition explodes; tank is destroyed and any models within 3” suffer D6 S10 hits with a –3 save modifier. |
| D6 | Side Sponson Damage Table |
| 1 | Sponson weapon is damaged and may only be fired if you first roll a 4+ on D6. |
| 2-5 | Sponson weapon is destroyed. |
| 6 | Sponson weapon is destroyed — but a flashback explosion forces a roll on the Hull Damage Table above. |
| D6 | Turret Damage Table |
| 1 | Demolisher Cannon is damaged and may only be fired if you first roll a 4+ on D6. |
| 2 | Turret is jammed, and may no longer rotate. Demolisher Cannon may only fire in a straight line at targets that are directly in front of it. |
| 3 | Turret gunner is slain. |
| 4-6 | Ammunition explodes; the tank is destroyed. All crew are slain and the turret is blown off, flying 2D6” in a random direction; anything under the spot where it lands suffers D6 S9 hits with a –6 save modifier. |
Imperial Griffon
Points
Tracked Vehicle (25). Includes a crew (113) of 1 Driver and 3 Gunners.
Weapons
Mounts a Heavy Mortar (244) with a 90° arc of fire to the front, one Heavy Bolter (234) with a 90° arc of fire to the front. The Heavy Bolter has a Targeter (221, +1 to hit).
Ram
Speed
Dmg
Save Mod
Slow
D12
-6
6‖
Armour
Location
Front
Side/Rear
Track
17
17
Hull
22
20
Side Sponson
18
18
Heavy Mortar
20
18
Mortar Crew
-
-
D6
Track Damage Table
1
May only move at Slow speed for the rest of the game.
2-5
Track is blown off; Griffon moves out of control (26) next turn and then comes to a halt
for the rest of the game.
6
Track is blown off; Griffon flips over and comes to rest D6” away in a random
direction. Any model it lands on takes D6 S7 hits with a –2 save modifier. Roll a D6 for each crew member; on a 4+, the crew is slain. Surviving models may disembark (26) using normal rules.
D6
Hull Damage Table
1
Driver is slain. Unless his position is taken over, the Griffon will move out of control
(26) until the end of the game
2-3
Roll a D6 for each crew member; on a 4+ they are slain.
4
Engine explodes, killing crew instantly. Tank is spun around to face a random direction,
then comes to a halt for the rest of the game.
5
Fuel tank explodes, killing all models on board. Vehicle goes out of control (26) next
turn and then explodes; every model within 3" suffers a hit from a Heavy Flamer (235).
6
Ammunition explodes; tank is destroyed and any models within 3” suffer D6 S10 hits
| with a –3 save modifier. | |
| D6 | Heavy Mortar Damage Table |
| 1 | Heavy Mortar is damaged and may only be used if you first roll a 4+ on D6. |
| 2-5 | Heavy Mortar is destroyed. |
| 6 | Heavy Mortar is destroyed — but a flashback explosion forces a roll on the Hull Damage Table above. |
| Crew Damage Table | |
| One of the two mortar gunners is hit. Roll to wound using normal Shooting Rules (27). |
Imperial Chimera Troop Transport
Points
Tracked (25). Includes a crew (113) of 1 Driver and 2 Gunners. May transport up to 11 Imperial Guard models.
All vehicle weapons come with Targeter (221, +1 to hit).
Weapons
The turret holds a Multilaser (236) and a StormBolter (229), both with a 360° arc of fire. Also mounts a Heavy Bolter (234) with a 90° arc of fire to the front. In addition, the Chimera has 3 Lasguns (226) on each side (total of 6) with a 180° arc to the side, which may be fired by transported models.
Ram
Speed
Dmg
Save Mod
Slow
D12
-5
6‖
Armour
Location
Front
Side/Rear
Track
16
16
Hull
21
18
Turret
20
20
D6
Track Damage Table
1
May only move at Slow speed for the rest of the game.
2-5
Track is blown off; tank moves out of control (26) next turn and then comes to a halt
for the rest of the game.
6
The Chimera flips over and comes to a rest D6" away in a random direction. Any
models under it take D6 S7 hits with a –2 save modifier. Roll a D6 for each model aboard; on a 4+ they are killed. Surviving models may disembark (26) as normal.
D6
Hull Damage Table
1
Driver is slain. Unless his position is taken over, the Chimera moves out of control (26)
for the rest of the game.
2-3
Explosion rips through the crew compartment; each crew member must roll a 4+ on D6
to avoid being slain.
4
Engine explodes, killing crew instantly. Chimera is spun around to face a random
direction, then comes to a halt for the rest of the game.
5
Fuel tank explodes, killing all models on board. Vehicle goes out of control (26) next
turn and then explodes; every model within 3" suffers a hit from a Heavy Flamer (235).
6
Ammunition explodes; Chimera is destroyed; any models inside are slain, and any
models within 3” suffer D6 S10 hits with a –3 save modifier.
D6
Turret Damage Table
1
Multilaser is damaged and may only be fired if you first roll a 4+ on D6.
2
Turret is jammed, and may no longer rotate. Multilaser may only fire in a straight line
at targets that are directly in front of it.
3
Multilaser destroyed.
4
Multilaser is destroyed, but secondary explosion forces a roll on the Hull Damage table
above.
5-6
Ammunition explodes; the Chimera is destroyed. All models inside are slain and the
turret is blown off, flying 2D6” in a random direction; anything under the spot where it lands suffers D6 S9 hits with a –6 save modifier.
Imperial Basilisk
Points
Tracked Vehicle (25). Includes a crew (113) of 1 Driver and 3 Gunners. All vehicle weapons come with
Targeters (221, +1 to hit).
Weapons
One Earthshaker Cannon (243) with a 45° arc of fire to the front, one Heavy Bolter (234) with a 90° arc of fire to the front.
Ram
Speed
Dmg
Save Mod
Slow
D12
-4
5‖
Armour
Location
Front
Side/Rear
Track
16
16
Hull
18
16
Earthshaker
17
17
D6
Track Damage Table
1
May only move at Slow speed for the rest of the game.
2-5
Track is blown off; tank moves Out of Control (26) next turn and then comes to a halt
for the rest of the game.
6
Track is blown off; Basilisk flips over and comes to rest D6” away in a random
direction. Any model it lands on suffers D6 S7 hits with a –2 save modifier. Roll a D6 for each model aboard; on a 4+, it is slain. Surviving models may disembark (26) as per normal rules.
D6
Hull Damage Table
1
Primary weapon is destroyed.
2-3
Roll a D6 for each crew member; on a 4+ they are slain.
4
Engine explodes, killing crew instantly. Tank is spun around to face a random direction,
then comes to a halt for the rest of the game.
5
Fuel tank explodes, killing all models on board. Vehicle goes out of control (26) next
turn and then explodes; every model within 3" suffers a hit from a Heavy Flamer (235).
6
Ammunition explodes; tank is destroyed and any models within 3” suffer D6 S10 hits
with a –3 save modifier.
D6
Earthshaker Damage Table
1
Earthshaker is damaged and may only be fired if you first roll a 4+ on D6.
2-5
Earthshaker is destroyed.
6
Earthshaker is destroyed; roll a secondary explosion on the Hull Damage Table above.
Imperial Hellhound
Points
Tracked Vehicle (25). Includes a crew (113) of 1 Driver and 2 Gunners. This vehicle causes Fear (47).
Weapons
One turret-mounted Inferno Cannon (244) with a 360° arc of fire, one Heavy Bolter (234) with a 90° arc to the front. The Heavy Bolter comes with a Targeter (221, +1 to hit).
Ram
Speed
Dmg
Save Mod
Slow
D12
-4
5‖
Armour
Location
Front
Side/Rear
Track
16
16
Hull
21
18
Turret
22
22
D6
Track Damage Table
| 1 | May only move at Slow speed for the rest of the game. |
| 2-5 | Track is blown off; tank moves Out of Control (26) next turn and then comes to a halt for the rest of the game. |
| 6 | Track is blown off and Hellhound flips over; wreck comes to a rest D6” away in a random direction. Any model it lands on takes D6 S7 hits with a –2 save modifier. Roll a D6 for each model aboard; on a 4+ they are slain in the crash. Surviving models may dismount as normal. |
| D6 | Hull Damage Table |
| 1 | Driver is slain. Unless his position is taken over, the Hellhound moves out of control for the rest of the game. |
| 2-3 | Explosion rips through the crew compartment; each crew member must roll a 4+ on D6 to avoid being slain. |
| 4 | Engine explodes, killing crew instantly. Hellhound is spun around to face a random direction, then comes to a halt for the rest of the game. |
| 5 | Fuel tank explodes, killing all models on board. Vehicle goes out of control (26) next turn and then explodes; every model within 3" suffers a hit from a Heavy Flamer (235). |
| 6 | Ammunition explodes; Hellhound is destroyed; any models inside are slain, and any models within 2D6” suffer a hit as by an Inferno Cannon. |
| D6 | Turret Damage Table |
| 1 | Inferno Cannon is damaged and may only be fired if you first roll a 4+ on D6. |
| 2 | Turret is jammed, and may no longer rotate. Inferno Cannon may only fire in a straight line at targets that are directly in front of it. |
| 3 | Turret gunner slain. |
| 4-6 | Ammunition explodes; the Hellhound is destroyed. All models inside are slain and the turret is blown off, flying 2D6” in a random direction; anything under the spot where it lands suffers D6 S9 hits with a –6 save modifier. |
Sentinel Squadron
Points/Sentinel (1-3x)
Walker/Dreadnought (25). Includes a crew (113) of 1 Driver.
Weapons
One Assault Cannon (233) with a 90° arc of fire to the front, with a Targeter (221, +1 to hit).
Ram
Speed
Dmg
Save Mod
Walk
Run/Charge
D6
-3
8‖
16‖
Armour
Location
Front
Side/Rear
Legs
15
15
Assault Cannon
15
15
Body
15
15
Driver
-
-
D6
Legs Damage Table
1
May not move next turn.
2
Staggers D3” in a random direction next turn.
3-4
May only limp D3” per turn.
5-6
Leg is blown off and Sentinel crashes to the ground (effectively destroyed).
D6
Weapon Damage Table
1
Assault Cannon is jammed/damaged and only works if you first roll a 4+ on D6.
2-5
Assault Cannon destroyed.
6
Explodes, slaying the driver.
D6
Body Damage Table
1
Controls are damaged; may only move or attack if you first roll a 4+ on D6.
2-3
Driver slain.
| 4-6 | Engine explodes, slaying the driver and causing D3 S6 hits with a –2 save modifier to all models within 3”. |
| Driver Damage Table | |
| Roll to see if the driver is slain using normal shooting rules (27); if he is slain, the Sentinel moves out of control (26) for one turn and then crashes to the ground. |
Support <25%
Allies
Allied forces may include any Space Marine (152) Chapter [Dark Angels (166), Blood Angels (163), Space Wolves (176), Ultramarines (182), Legion of the Damned (170)], Imperial Agents (96) [Inquisition (97), Adeptus Arbites (101), Sisters of Battle (142)] and/or a single Assassin (103). Additional allies may be chosen from the Eldar (81) or Squats (186) army lists. All units may normal composition requirements.
Necron Rules
Deployment
The Necron player always deploys last and always gets the first turn.
Disrupter Zone
If a vehicle or a dreadnought is within 6” of a Necron at the start of its turn, then it must roll a 4+ on D6 to move at all that turn. Even if successful at this roll, its movement is halved that turn. Any weapon attempting to shoot suffers a –1 To Hit penalty for each Necron within 6”. Enemies in close combat (32) may not use the Strength of any close combat weapons when resolving hits; use the Strength of the model itself. This rule applies to all weapons, except Tyranid (190) weaponry.
Isolation
Necrons ordinarily must maintain squad coherency as is normal for a squad. However, ―active‖ Necrons do not need to maintain this coherency with Necrons which have been downed in combat and are attempting to repair
(120) themselves. Thus a Necron which repairs itself may find itself outside of normal coherency to the rest of its squad. Necrons in such a condition are said to be isolated.
Necrons which recover must try to join up with a Necron unit of the same type as themselves or with another individual model of the same kind. Until it does so, the Necron is isolated. Isolated Necrons cannot shoot, although fights as normal in all other respects.
Leadership and Defeat
Necrons do not take Leadership tests — any test they would normally be required to take, they automatically pass. The Ld of 10 has been provided for convenience.
If the entire Necron force is reduced to 25% or less of its original number at the start of any Necron turn, then the whole army will mysteriously vanish; the Necrons are assumed to have been driven away. Necrons which have fallen down but not yet removed can‘t be counted as part of the remaining force, so a Necron army can be defeated if enough models are knocked down even if they are not permanently destroyed.
Repair
Slain Necrons are not removed as casualties but are placed on their sides in a manner similar to that of a slain Tyranid with the Regeneration Biomorph (193). The Necron takes no part in the game while in this condition and cannot be further harmed. At the start of each of its controller‘s turns, roll a D6:
| Roll | Effect |
| 6 | The Necron is repaired. It rises to its feet and can immediately move and fight as normal. |
| 2-5 | The Necron remains on the ground. |
| 1 | The Necron‘s body fails to repair itself and wastes away; remove the model as a casualty. |
Necron Units
Characters <50%
Necron Lord
Points
| Troop Type | M | WS | BS | S | T | W | I | A | Ld |
| Necron Lord | 4 | 4 | 4 | 5 | 5 | 3 | 4 | 3 | 10 |
Armoured body (2+ save), carries a Staff of Light (228). In addition, note that all Necrons are subject to the
Repair (120), Isolation (120), and Leadership/Defeat (120) rules for Necrons.
Squads 25%+
Necron Warrior Squad
|
| Поделиться: |