Заглавная страница Избранные статьи Случайная статья Познавательные статьи Новые добавления Обратная связь FAQ Написать работу КАТЕГОРИИ: ТОП 10 на сайте Приготовление дезинфицирующих растворов различной концентрацииТехника нижней прямой подачи мяча. Франко-прусская война (причины и последствия) Организация работы процедурного кабинета Смысловое и механическое запоминание, их место и роль в усвоении знаний Коммуникативные барьеры и пути их преодоления Обработка изделий медицинского назначения многократного применения Образцы текста публицистического стиля Четыре типа изменения баланса Задачи с ответами для Всероссийской олимпиады по праву 
Мы поможем в написании ваших работ! ЗНАЕТЕ ЛИ ВЫ?
Влияние общества на человека
Приготовление дезинфицирующих растворов различной концентрации Практические работы по географии для 6 класса Организация работы процедурного кабинета Изменения в неживой природе осенью Уборка процедурного кабинета Сольфеджио. Все правила по сольфеджио Балочные системы. Определение реакций опор и моментов защемления |
Unit 6 Presentations: EquipmentСодержание книги
Поиск на нашем сайте
Presentation Equipment
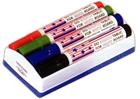
Exercise 1. Match the pictures (1-6), the names of corresponding pieces of equipment (a-f) and the definitions (A-F), (e.g. 1-c-F).
Work with a partner. 1) Discuss how these pieces of equipment can be used in different kinds of presentations. 2) Report your findings to the group.
Exercise 3. Comment on how visual information is being presented in these pictures, then produce five key recommendations for how to use visual supports in a presentation.
Exercise 4. Read the tips for using some of the pieces of equipment described in Exercise 1 during presentations. Can you suggest any additional ideas?
Learn these basic techniques for using flipcharts and boards:
The whiteboard (more rarely blackboard or greenboard) is a useful device for spontaneous writing - as in brainstorming, for example. For prepared material, the OHP might be more suitable. The duster is used for cleaning the whiteboard. It is essential that the duster be clean to start with. You may consider carrying your own duster just in case. Markers are used for writing on the whiteboard or flipchart. Again, it's a good idea to carry a spare set of markers in case you are given some used ones which do not write well.
Some people prefer the flipchart to the whiteboard as you may return to the previously written information, but its use is limited to smaller presentations. Digital Overheads Software exists that permits you to create digital "overheads" that may be displayed using a small computer and a specially designed device atop an ordinary overhead projector. All of the guidelines that are presented for acetate overheads apply to digital overheads. However, digital overheads can be much more elaborate in design than the commonplace acetate overhead. As with any tool, however, you should be familiar with their limitations. Follow these simple rules for constructing digital overheads:
The Slide projector - which must be used in a darkened room - adds a certain drama. Some slide projectors can be synchronised with audio for audio-visual (AV) presentations. These projectors are typically used for larger presentations. The majority take 35mm slides or transparencies (as seen here), but projectors for 6x6cm slides are also available. The OHP has several advantages over the 35mm slide projector:
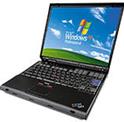
The notebook computer is increasingly being used to display graphics during presentations. It is often used in conjunction with an (overhead) projector, which actually projects the image from the computer screen onto the wall screen.
Handouts are any documents or samples that you 'hand out' or distribute to your audience. Note that it is not usually a good idea to distribute handouts before your presentation. The audience will read the handouts instead of listening to you.
REMEMBER! Your most important piece of equipment is... YOU! Make sure you're in full working order, and check your personal presentation carefully – if you don't, your audience will!
Visual aids 80% of what we learn is learned visually (what we see) and only 20% is learned aurally (what we hear). This means that: - visual aids are an extremely effective means of communication - non-native English speakers do not need to worry so much about spoken English since they can rely more heavily on visual aids
It is important not to overload your audience's brains. Keep the information on each visual aid to a minimum – and give your audience time to look at and absorb this information. Remember, your audience have never seen these visual aids before. They need time to study and to understand them. Without understanding there is no communication.
Unit 7 Using Power Point Read the following article about giving a Power Point presentation and make its summary.
|
|||||||||||||||||||||||||||||||||||||||||||||||||
|
|
Последнее изменение этой страницы: 2016-04-18; просмотров: 659; Нарушение авторского права страницы; Мы поможем в написании вашей работы! infopedia.su Все материалы представленные на сайте исключительно с целью ознакомления читателями и не преследуют коммерческих целей или нарушение авторских прав. Обратная связь - 18.222.104.211 (0.009 с.) |


 2
2
 3
3
 4
4
 5
5

 7
7
 8
8
 9
9
 10
10
 11
11

 13
13